Flashing Sonoff S31 With Flipper Zero (No USB Dongle Needed!)
Table of Contents
A step-by-step guide on flashing the Sonoff S31 smart plug with Tasmota, using only a Flipper Zero (no USB-to-Serial dongle, no soldering required).
I was having challenges with my old Wemo devices. They were constantly dropping connections and I wanted to get away from cloud dependencies. After some research, I came across the Sonoff S31 — a smart plug available in two variants: Zigbee and Wi-Fi.
What really caught my attention was the Wi-Fi version: it could be flashed with custom firmware like Tasmota or ESPHome, making it fully local and perfect for my Home Assistant setup. Sold!
But I still had one big question:
How can I flash these devices without a USB-to-Serial dongle?
Looking at my desk, I noticed my Flipper Zero. Could I use its GPIO pins to flash the Sonoff? Challenge accepted.
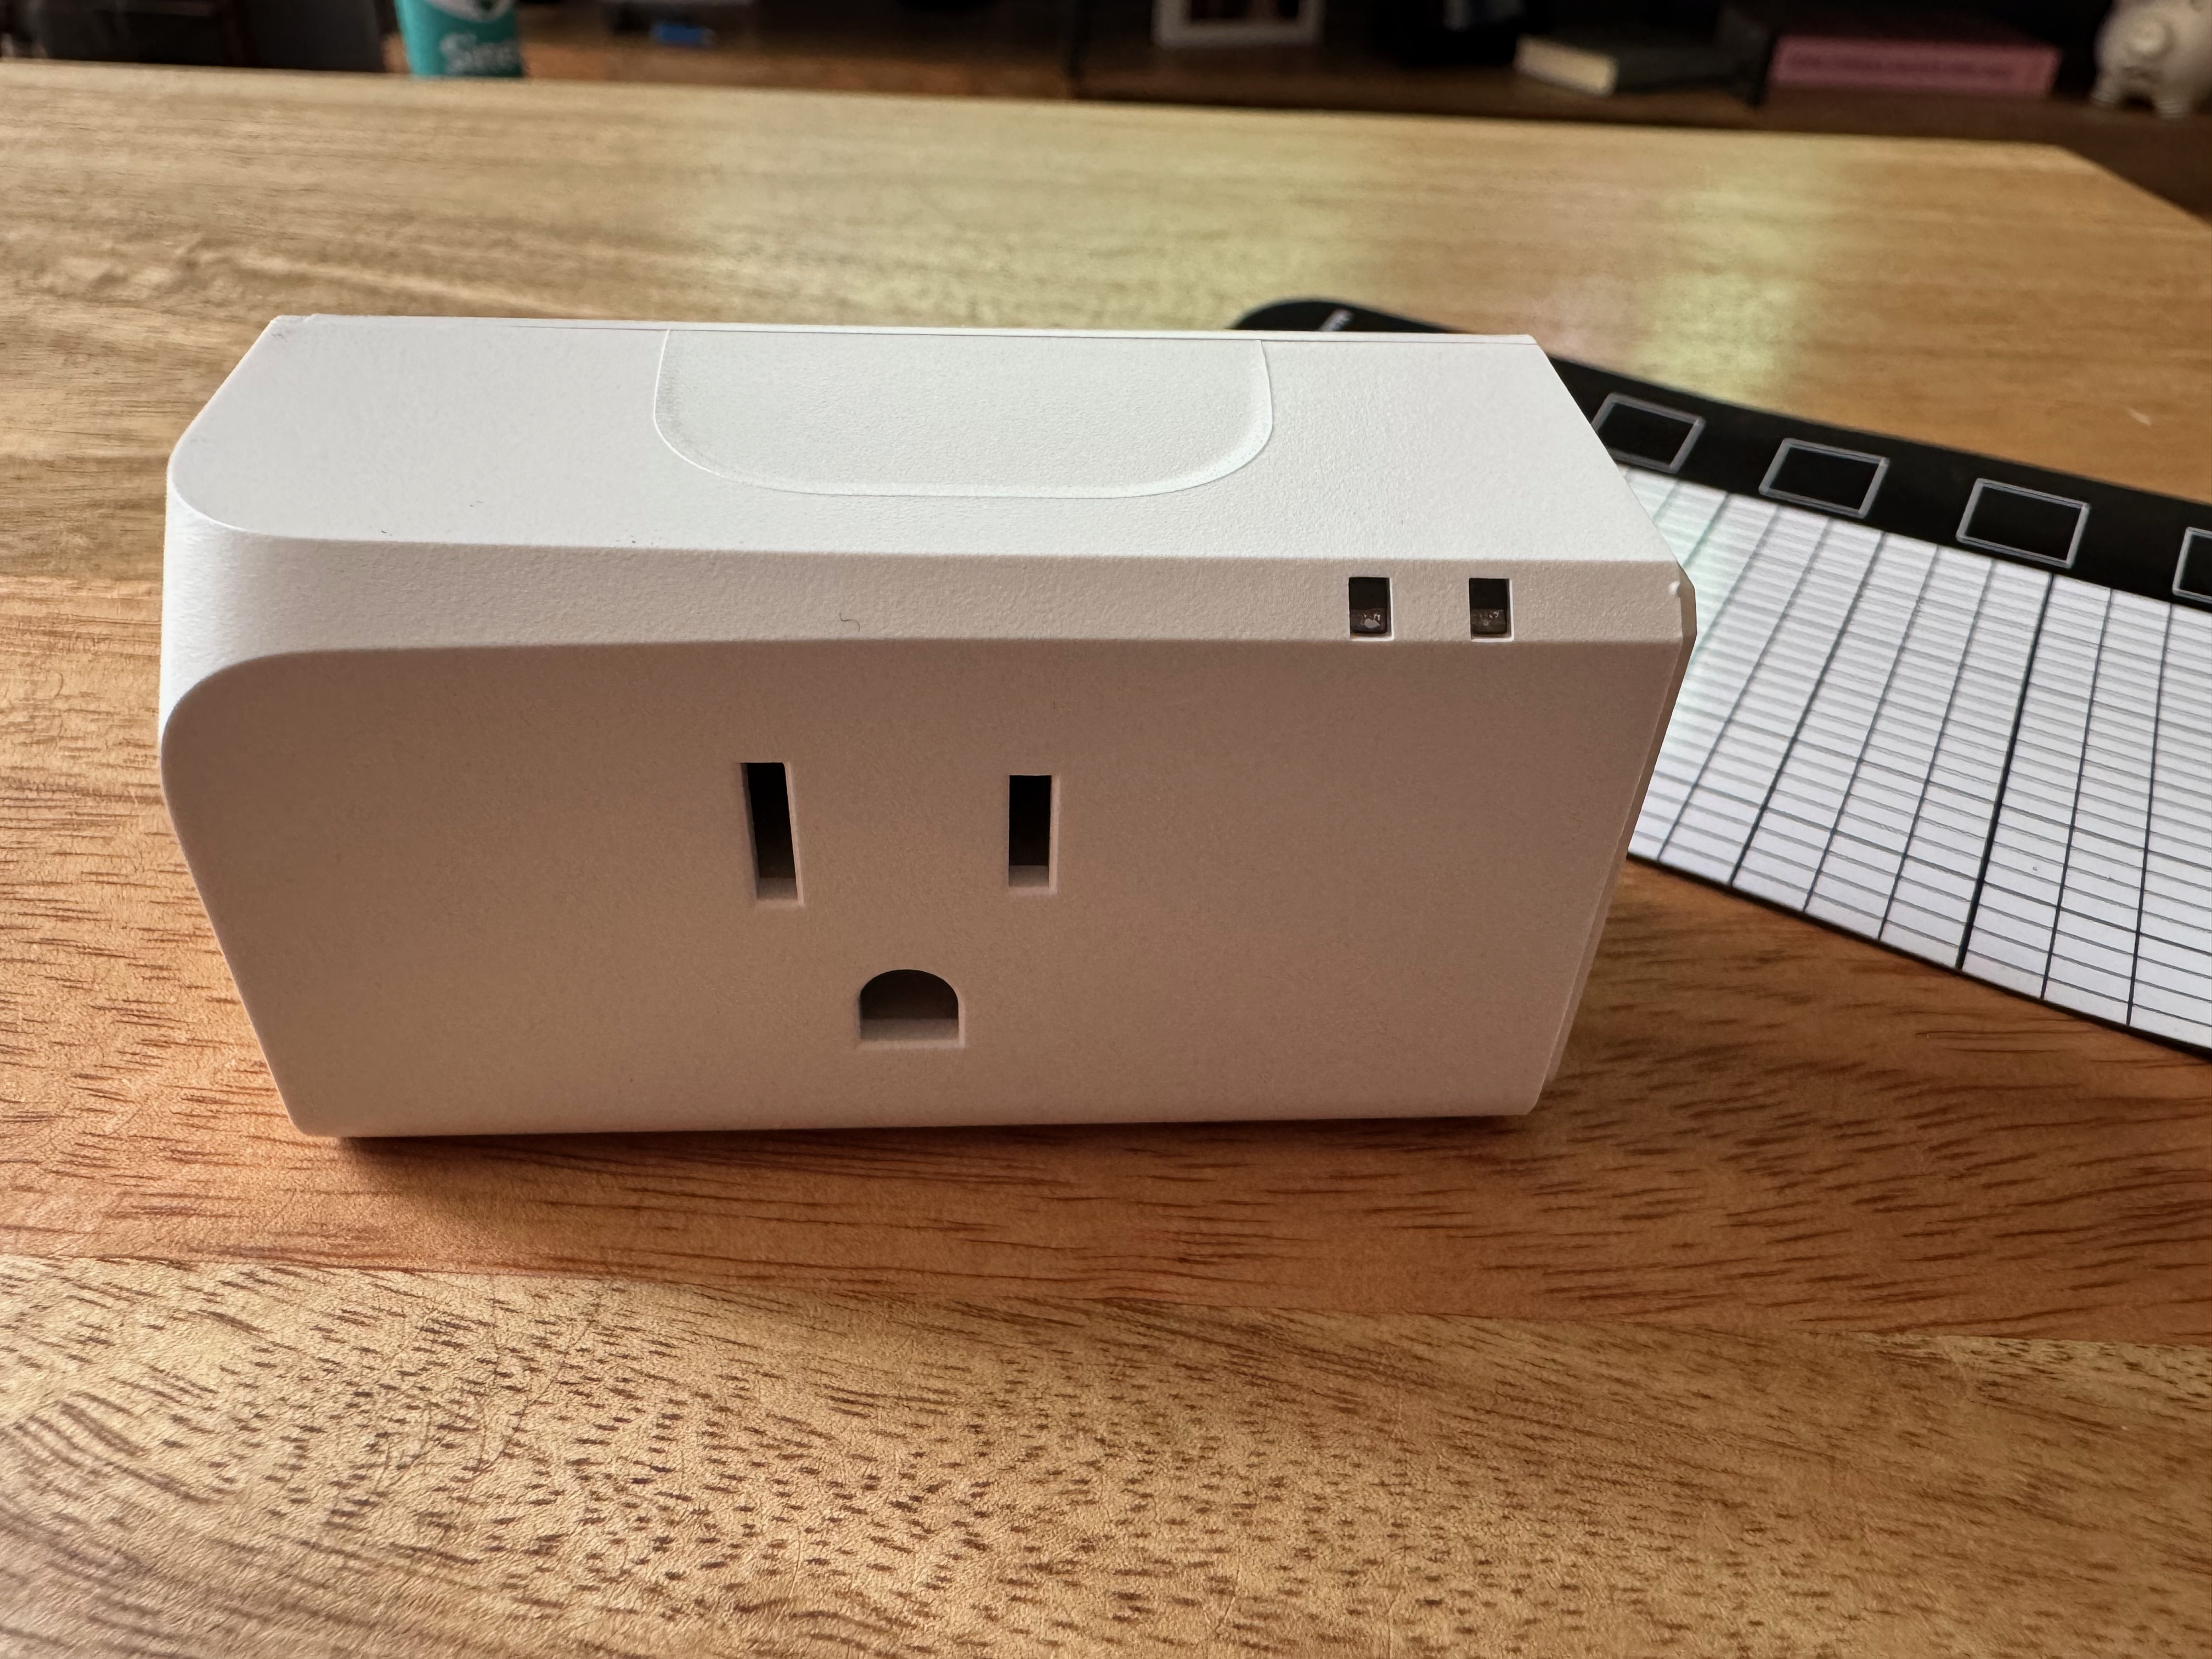
Opening the Sonoff S31
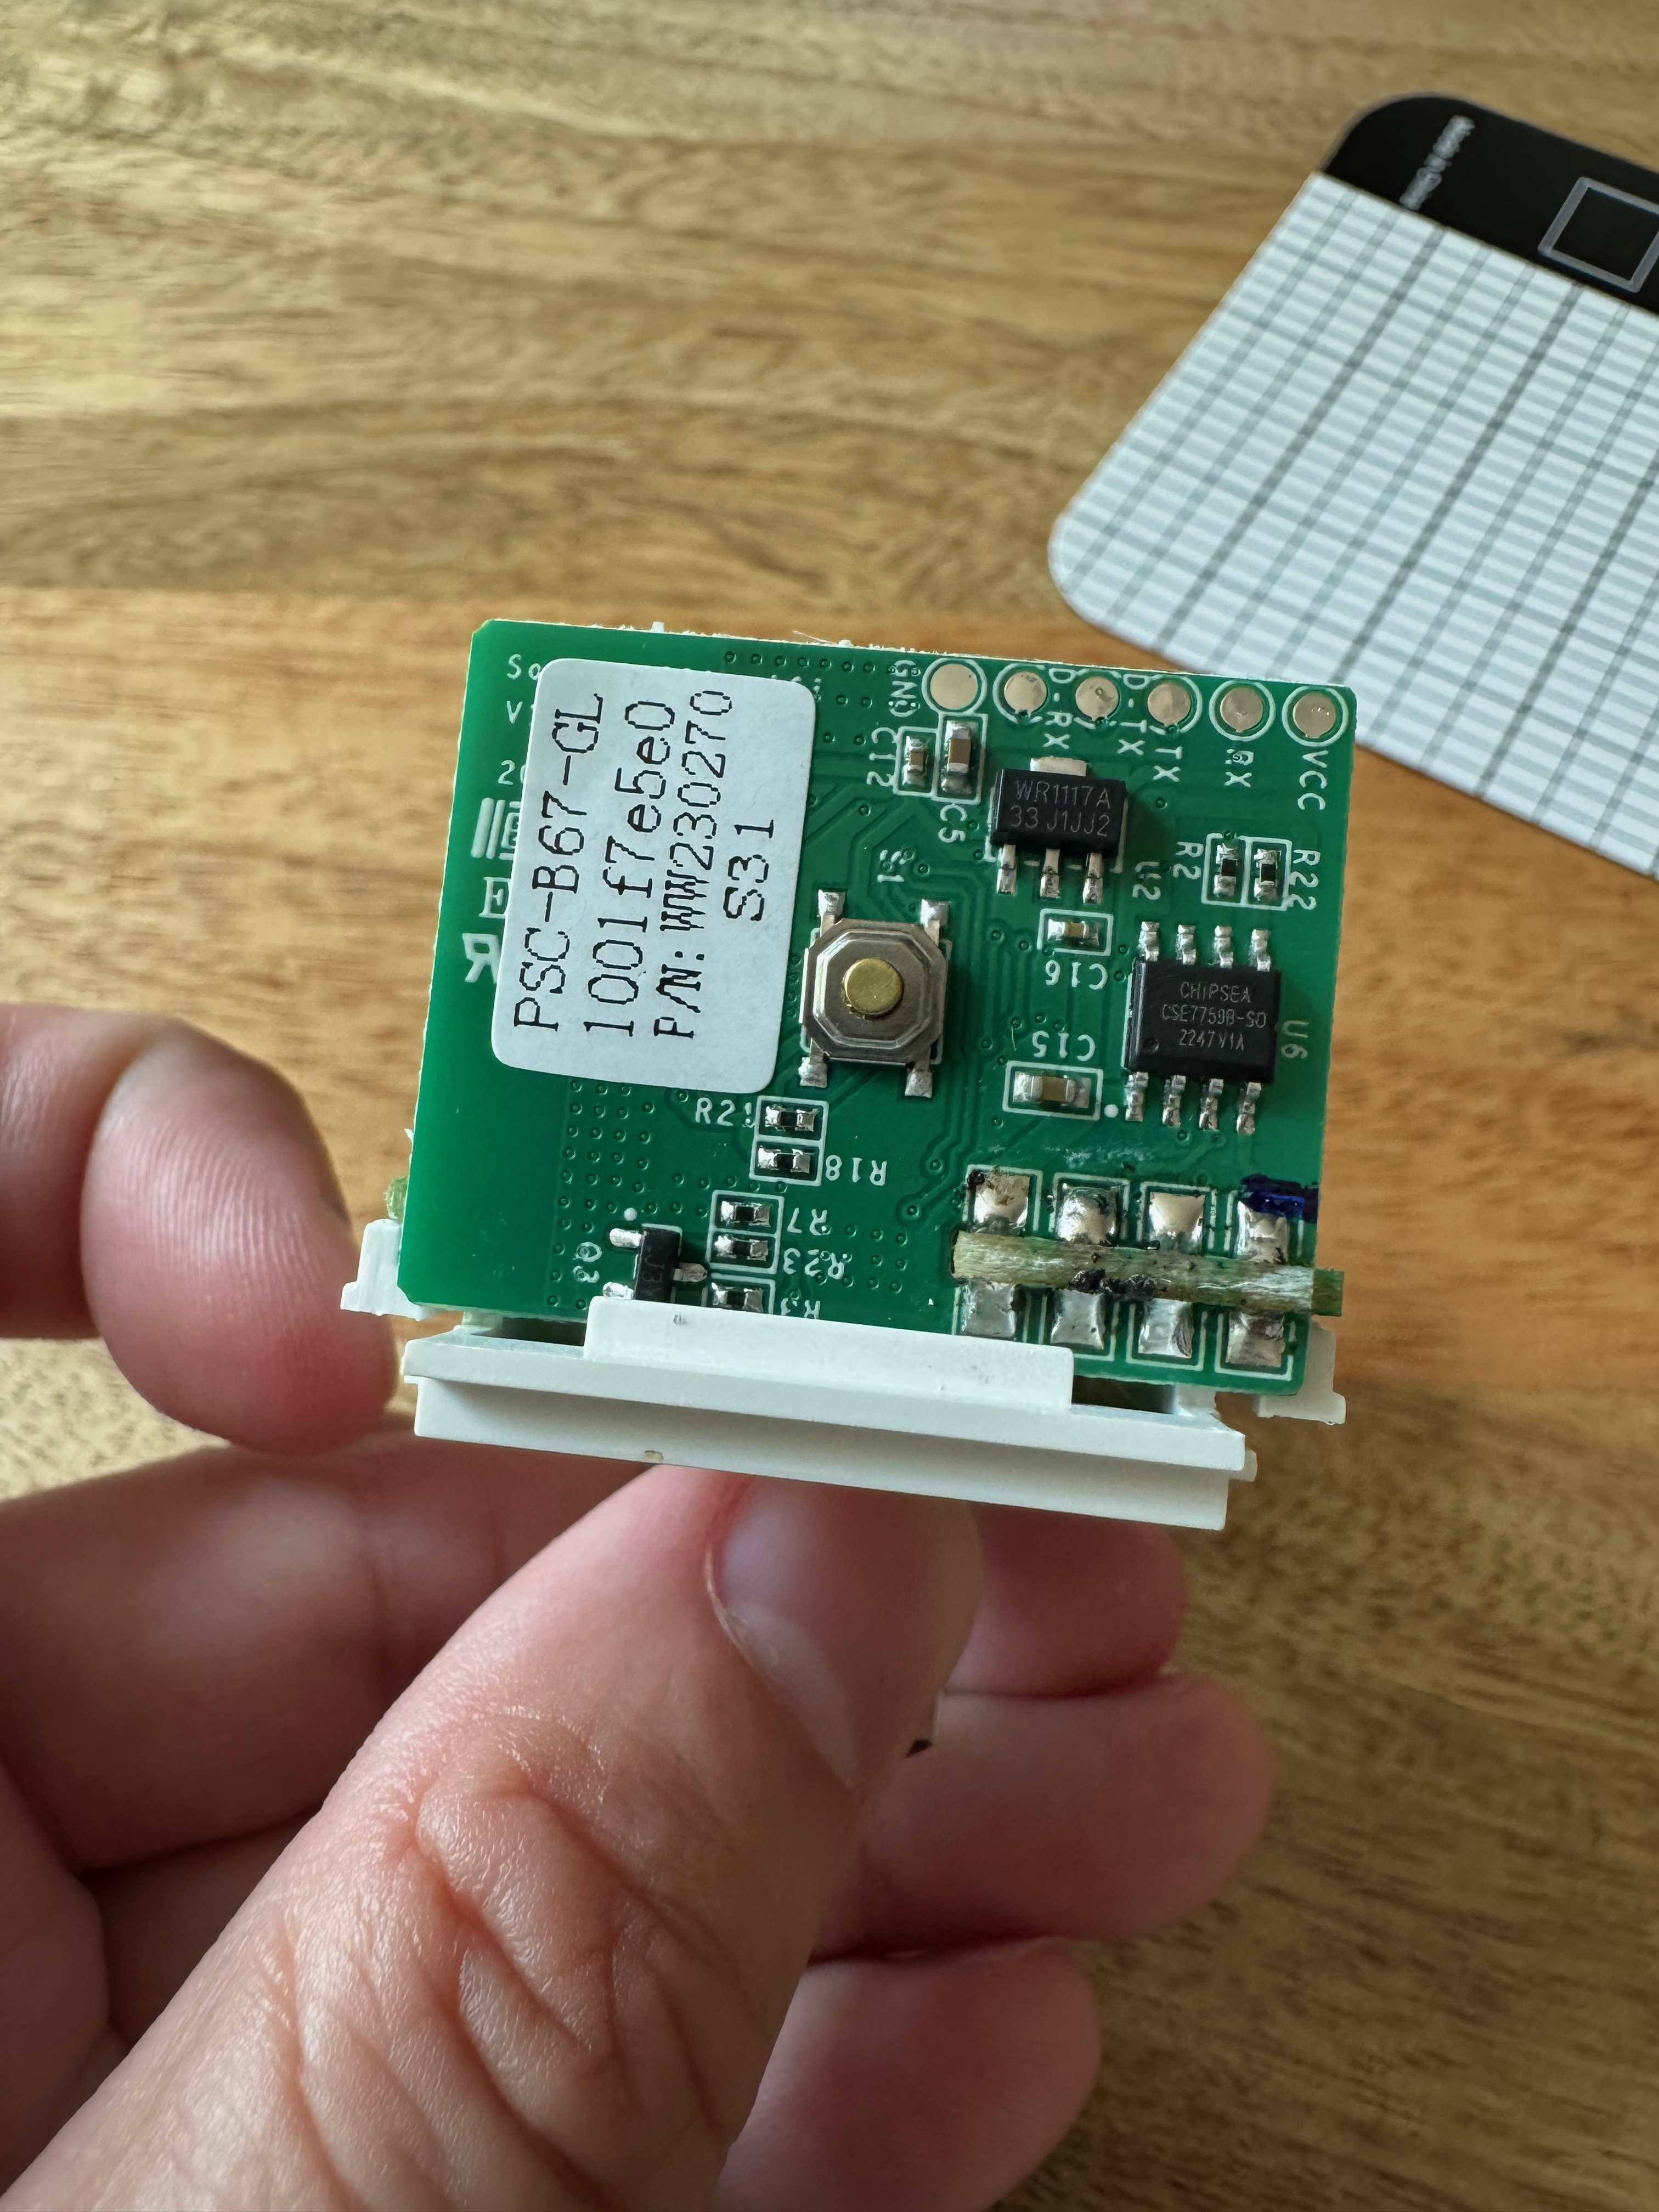
Opening the device is straightforward. Use a knife or screwdriver to pop off the gray cover, then remove three screws. That reveals the board inside:
On the PCB, you’ll see the flashing header pins. For our purposes, we only need VCC, RX, TX, and GND:
Wiring the Flipper Zero
The Flipper Zero provides both 5V and 3.3V outputs.
⚠️ Important: the Sonoff S31 expects 3.3V, so make sure to use the right pin.
On the Flipper Zero, connect:
- 3V3 → VCC
- TX → RX
- RX → TX
- GND → GND
Notice the TX/RX inversion: your Flipper’s TX must go to the Sonoff’s RX, and vice versa.
Here’s what my setup looked like:
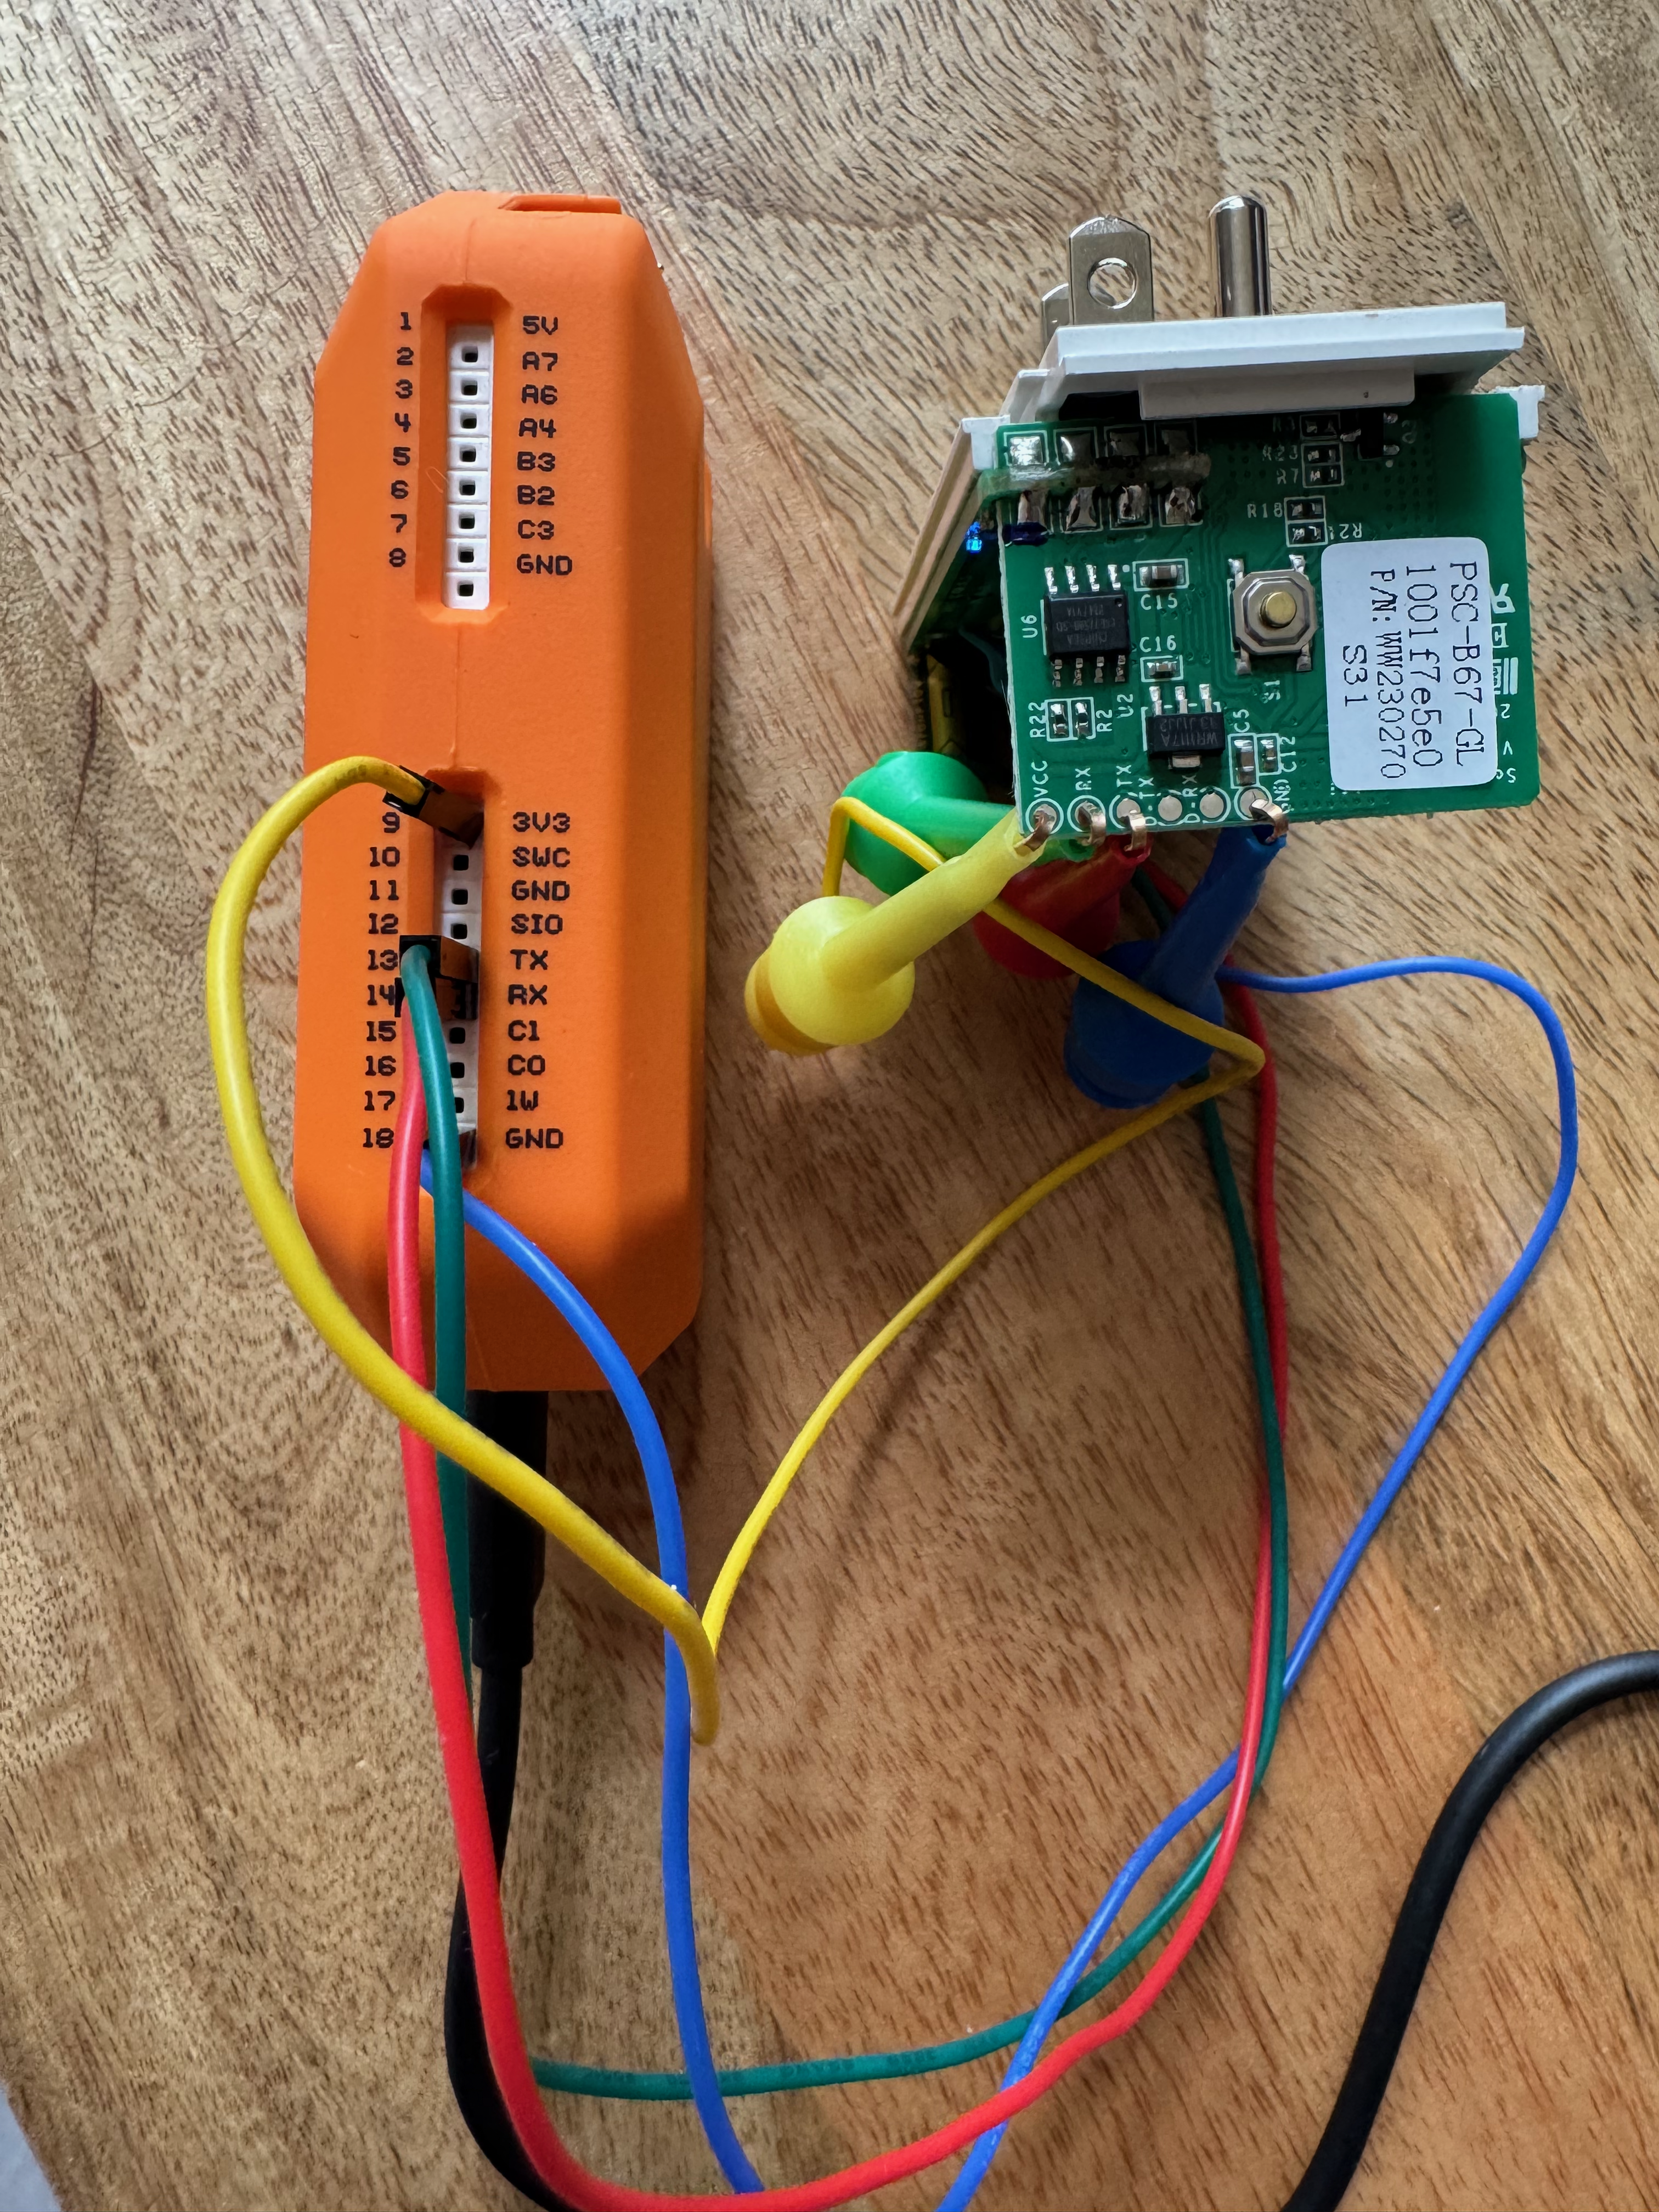
To avoid soldering, I used test hook clips (Amazon link) instead of pin headers. That way I didn’t need to modify the board permanently.
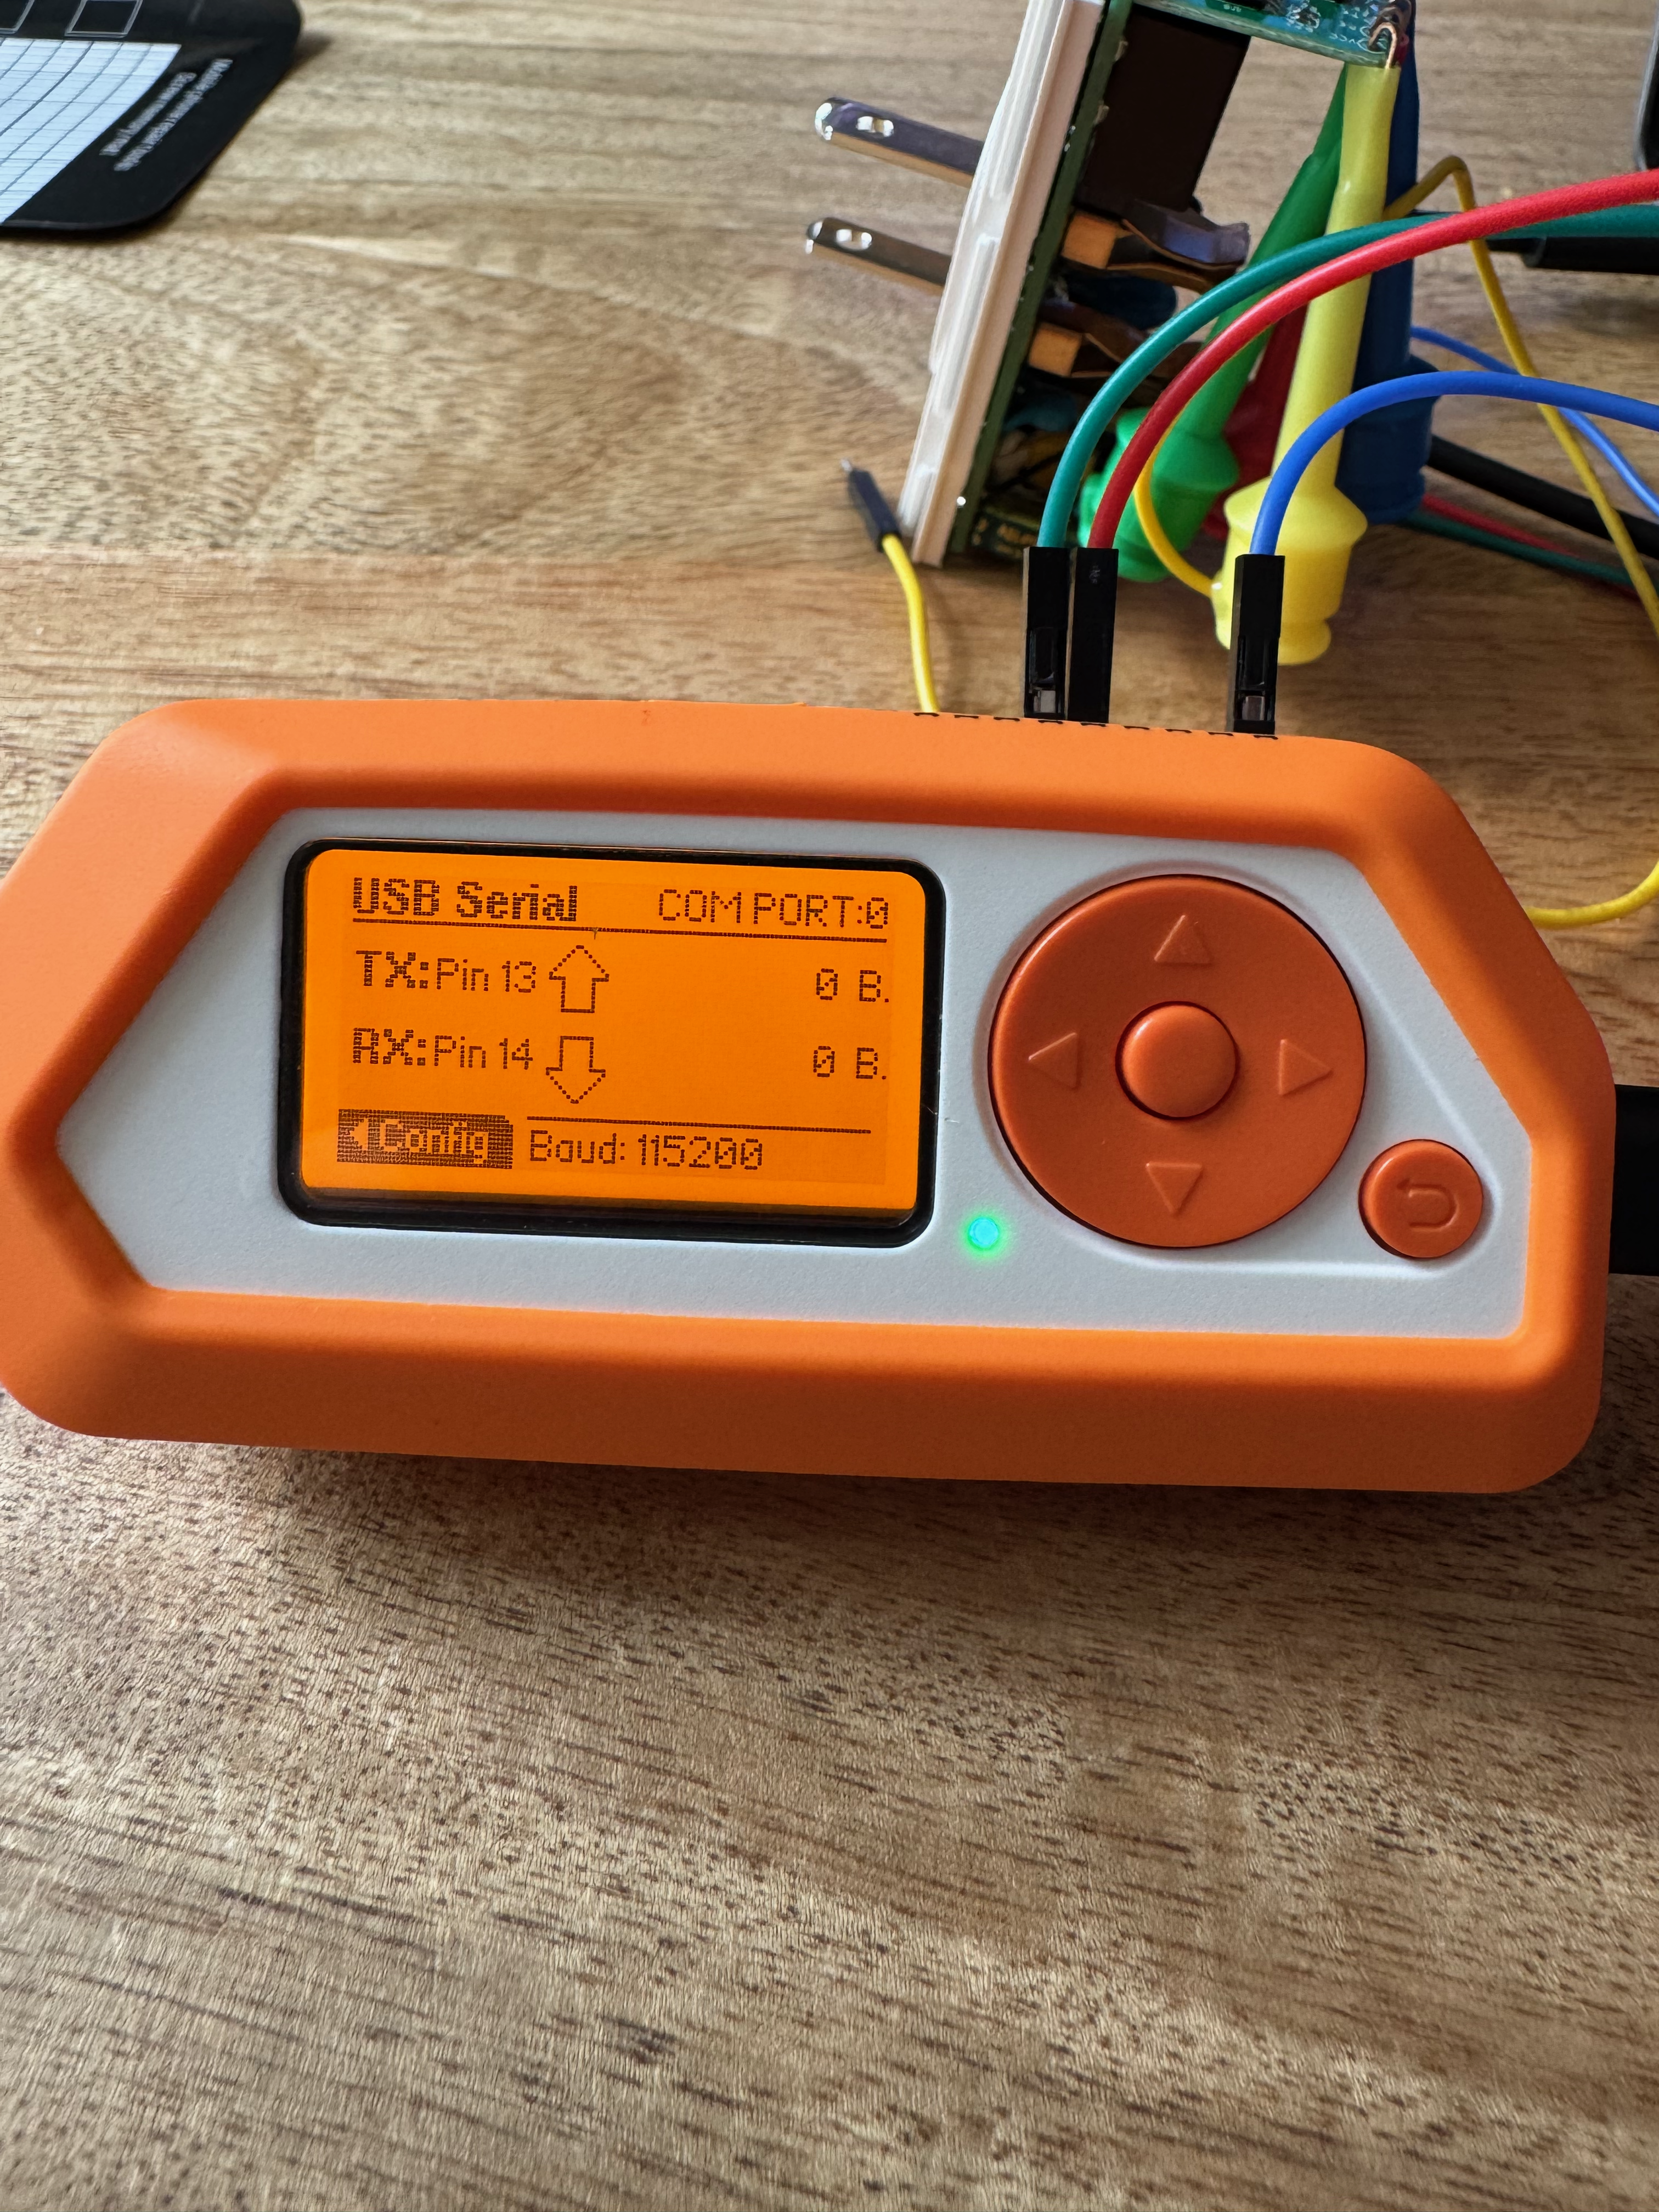
Setting Flipper Zero to USB-UART Bridge
Next step is to expose the Flipper as a USB-to-Serial adapter:
- On Flipper, go to GPIO → USB-UART Bridge
- This creates a COM port on your computer that we’ll use to flash firmware.
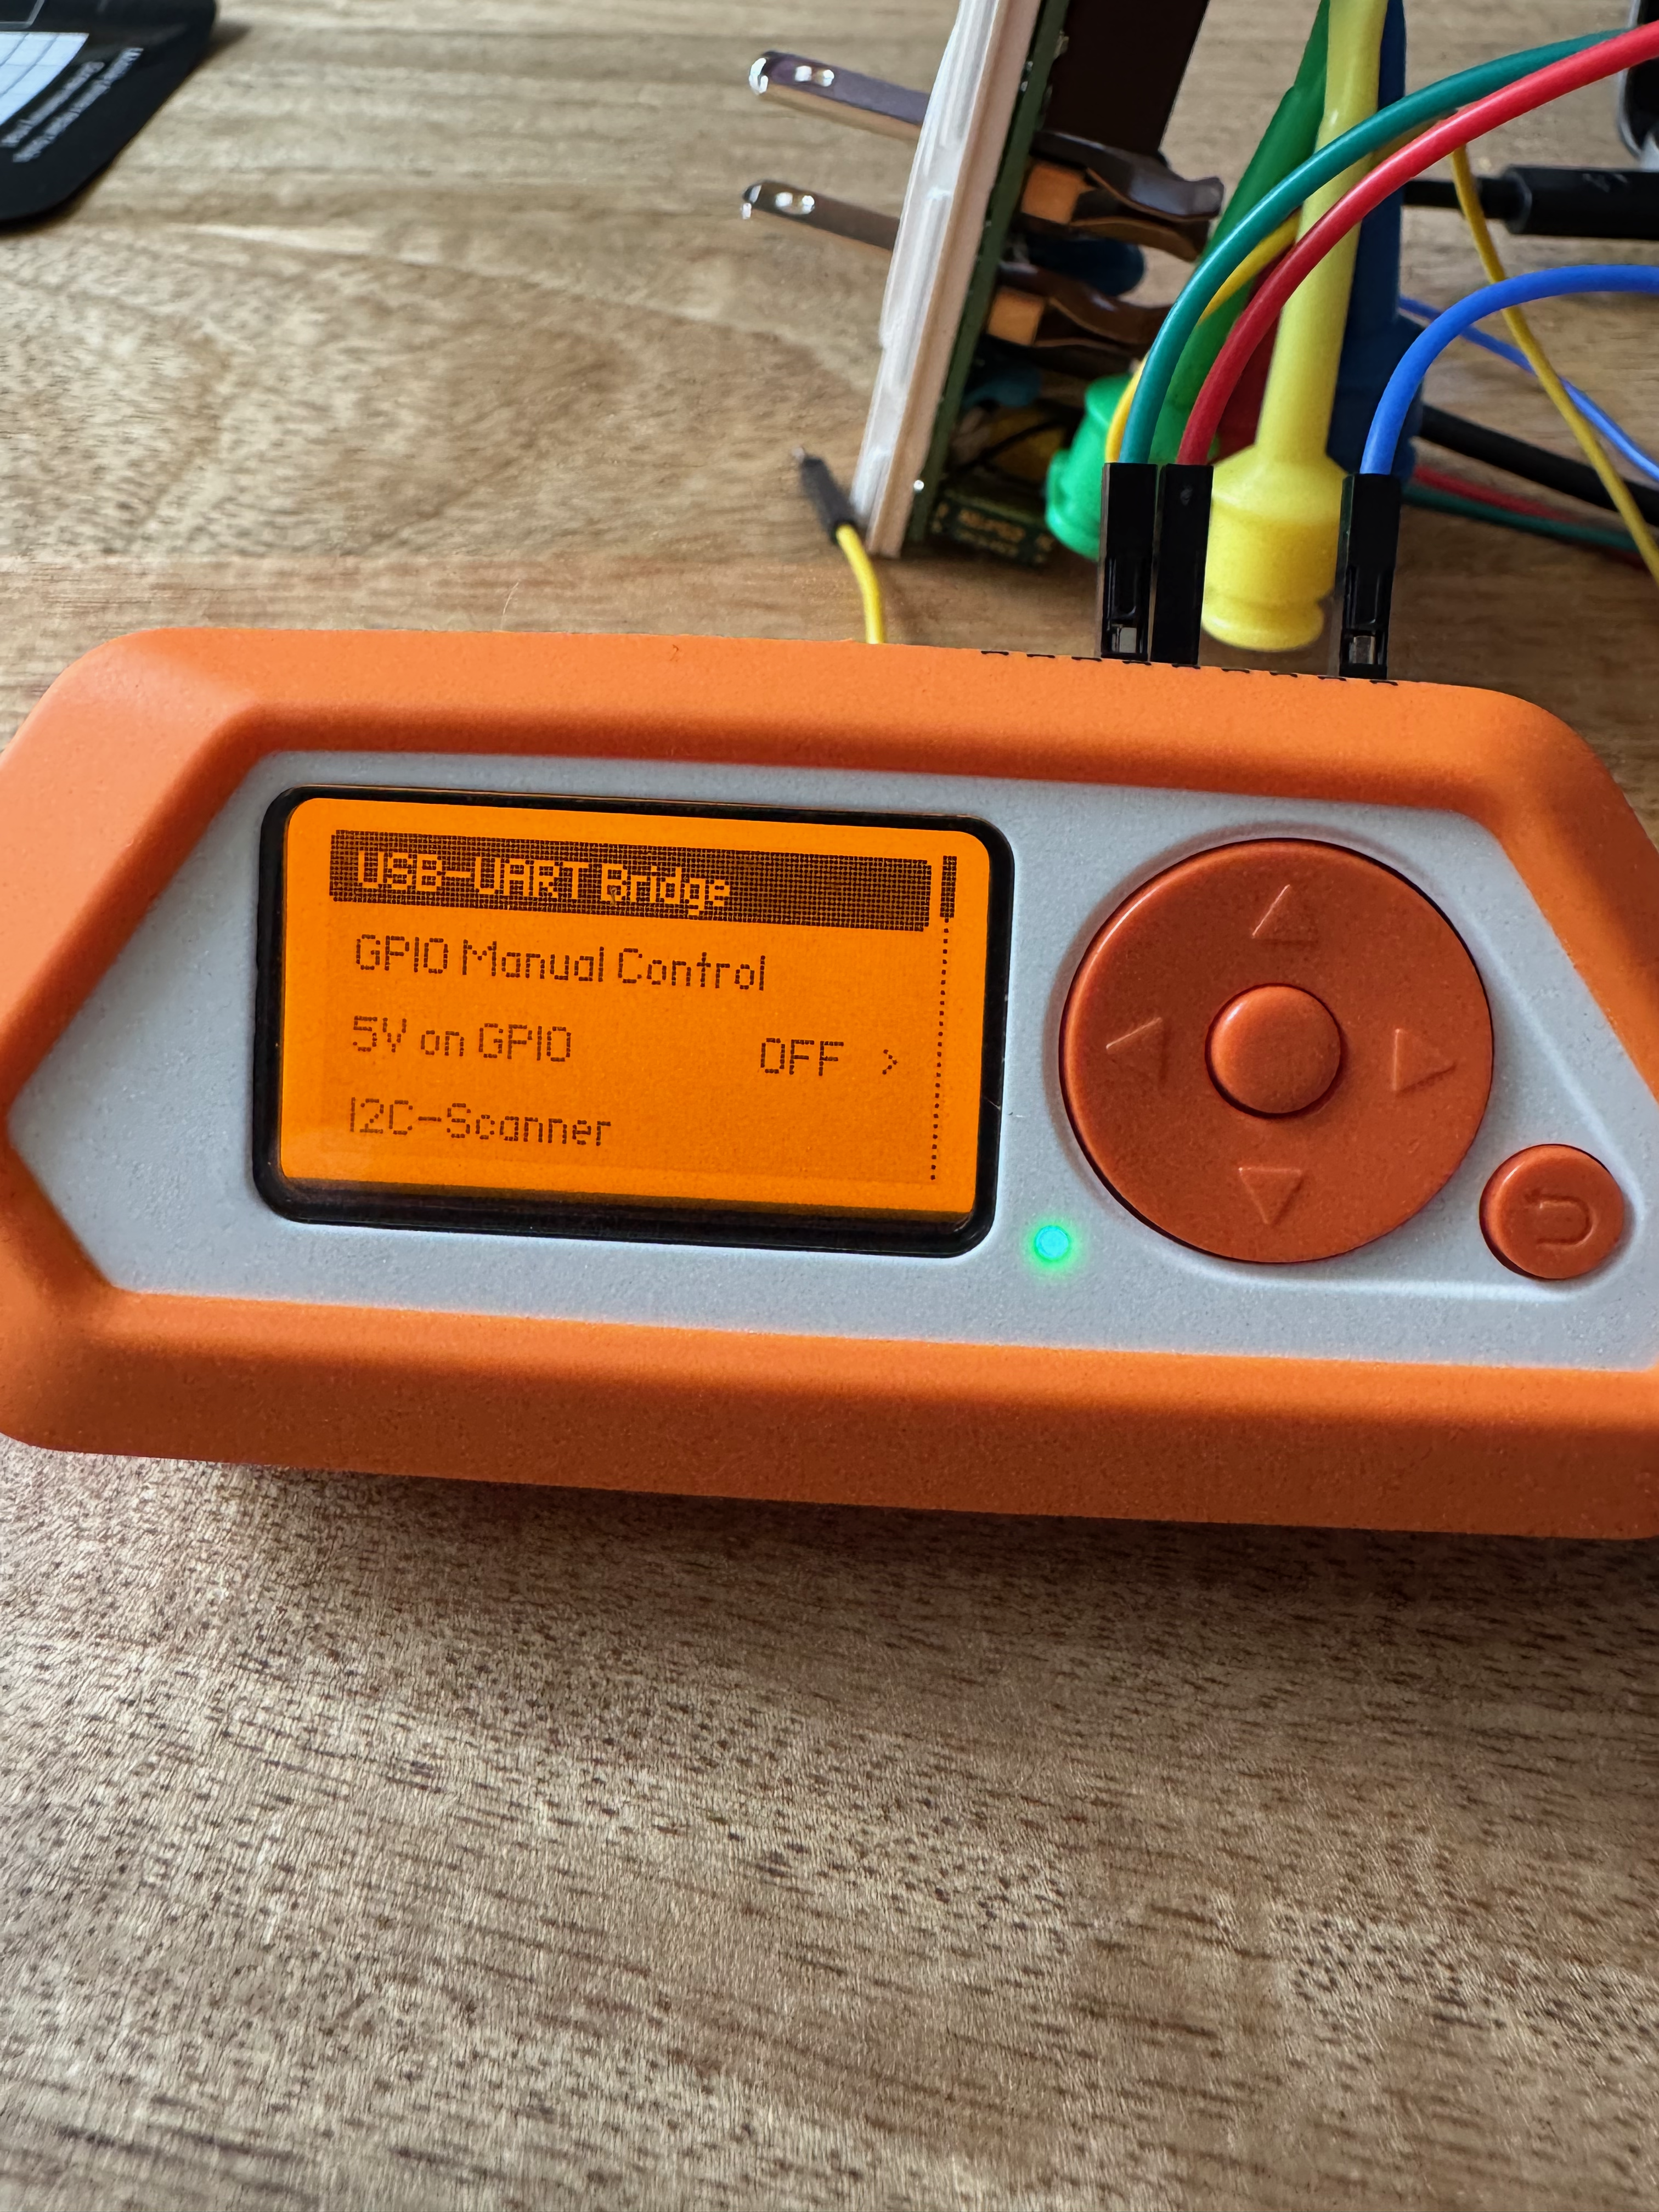
When everything is wired, hold the power button on the Sonoff while plugging it in — this enables boot mode.
Flashing Tasmota
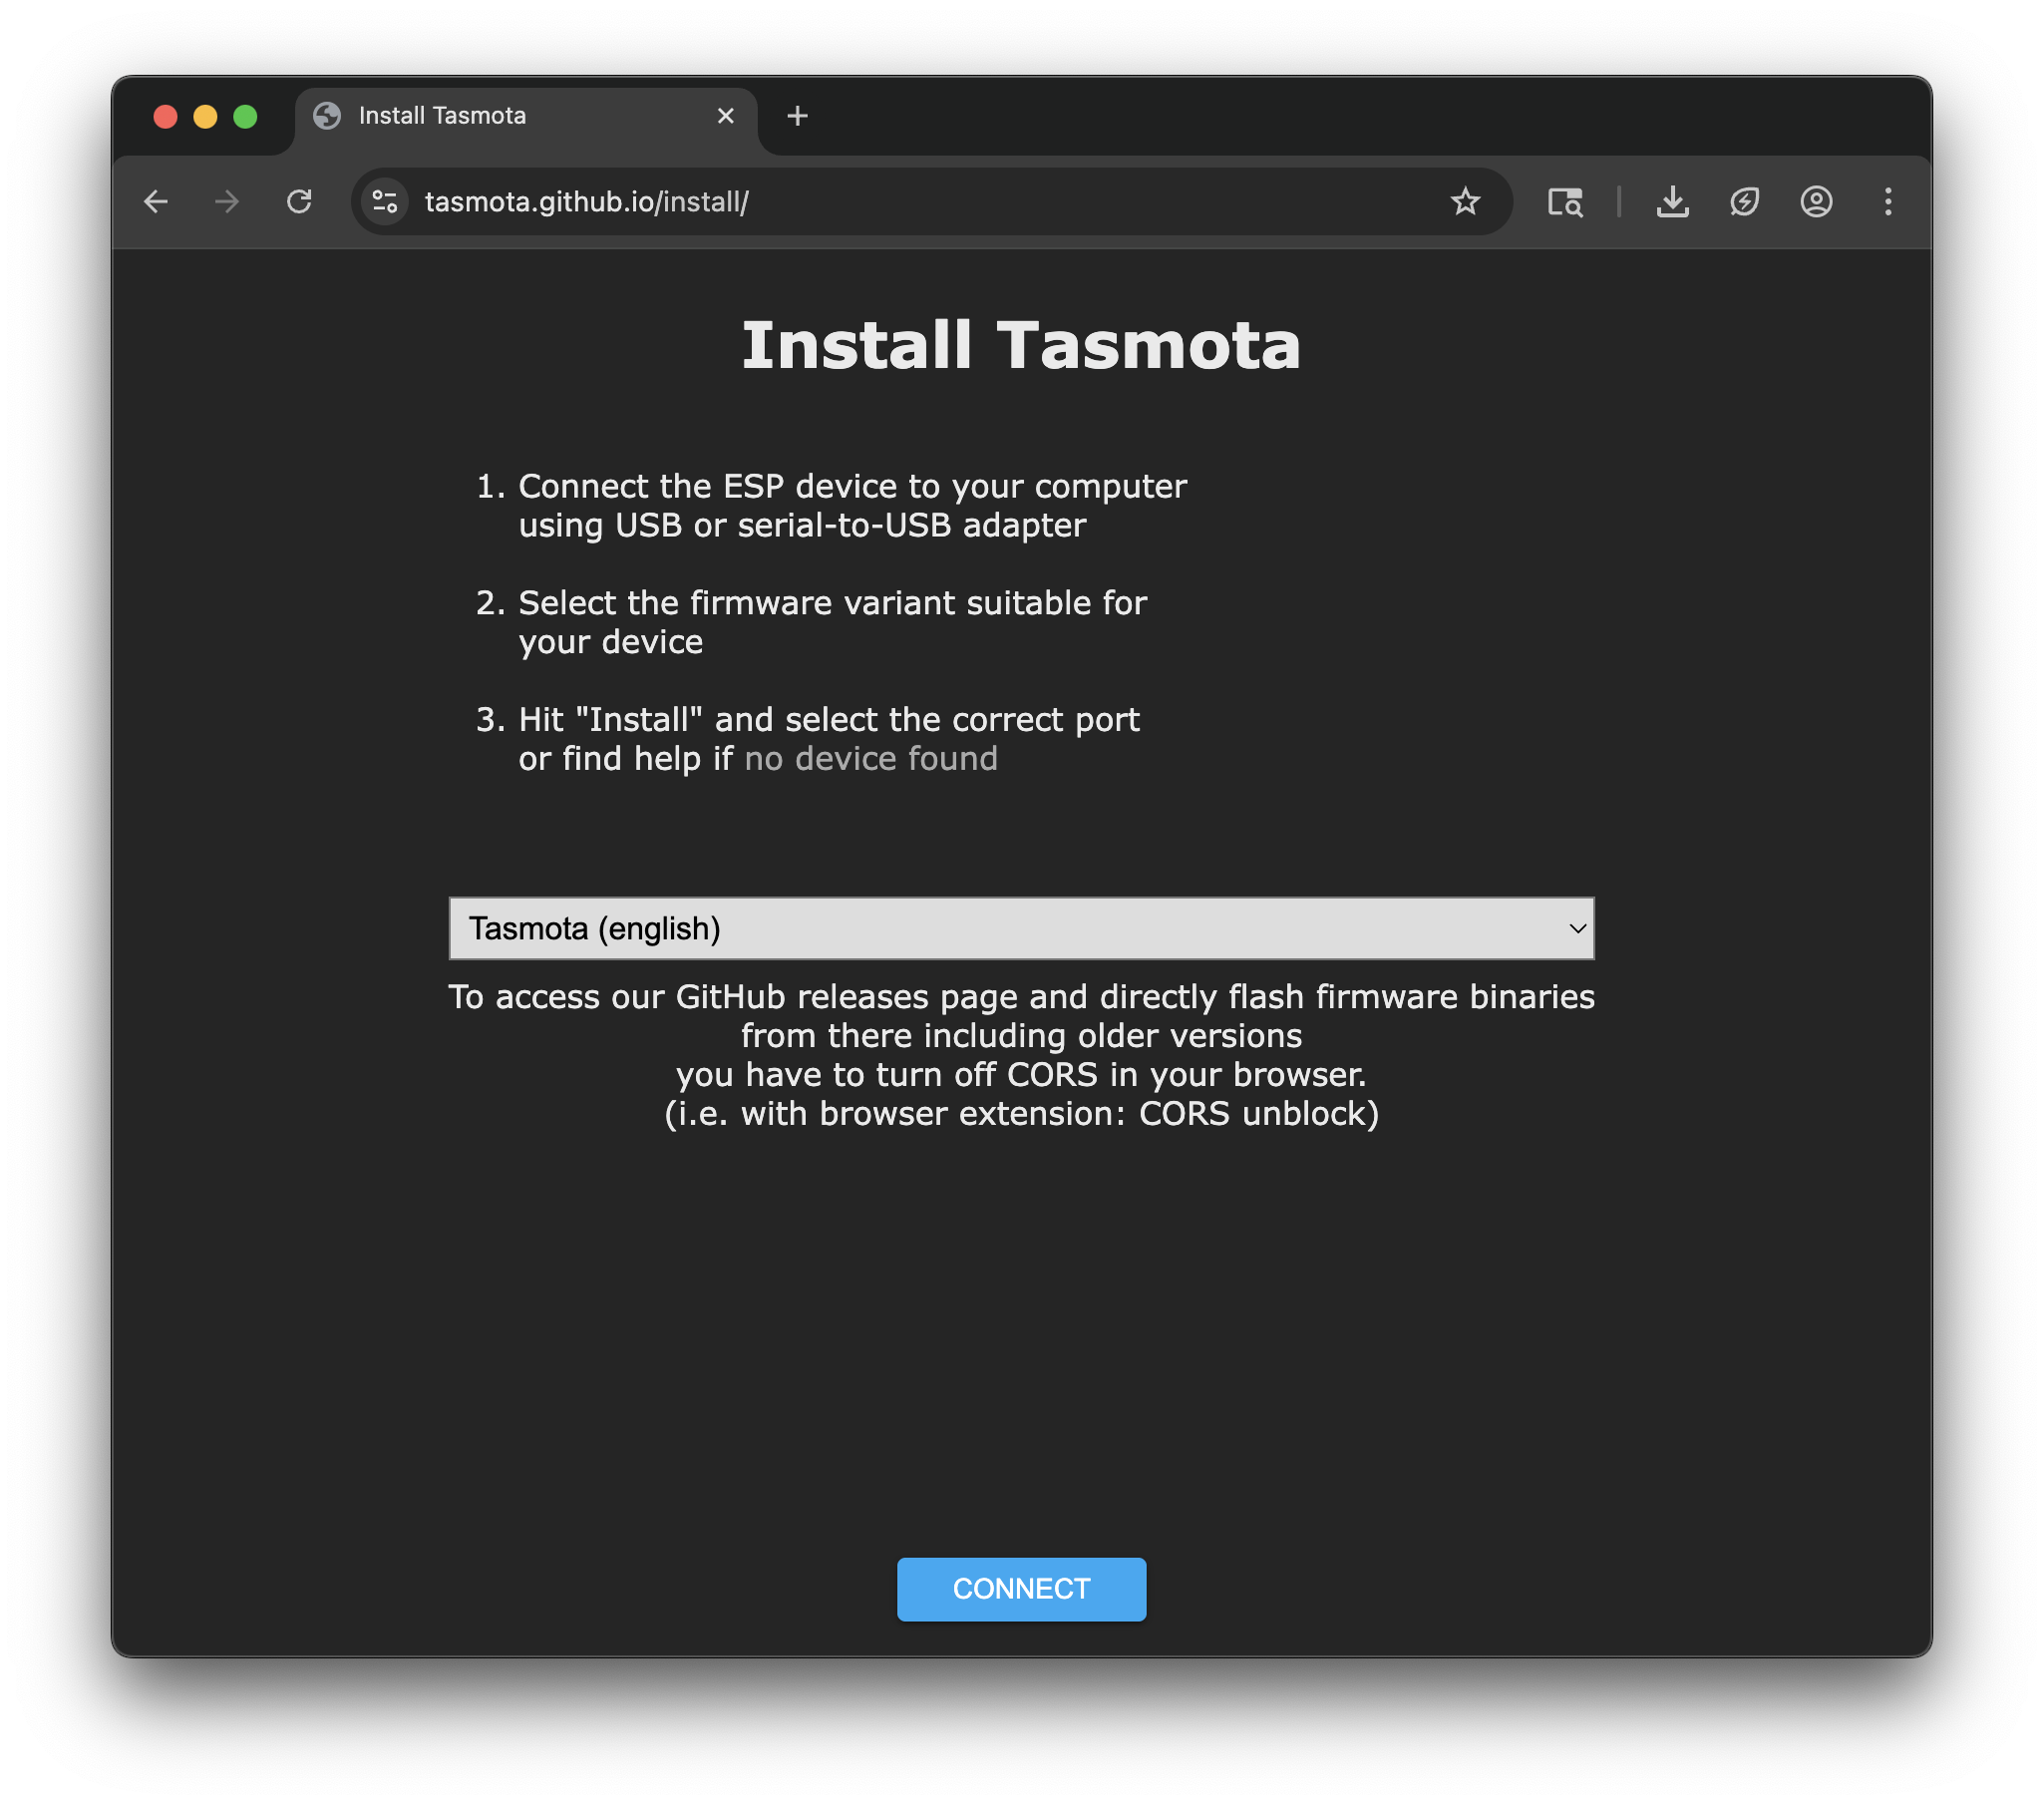
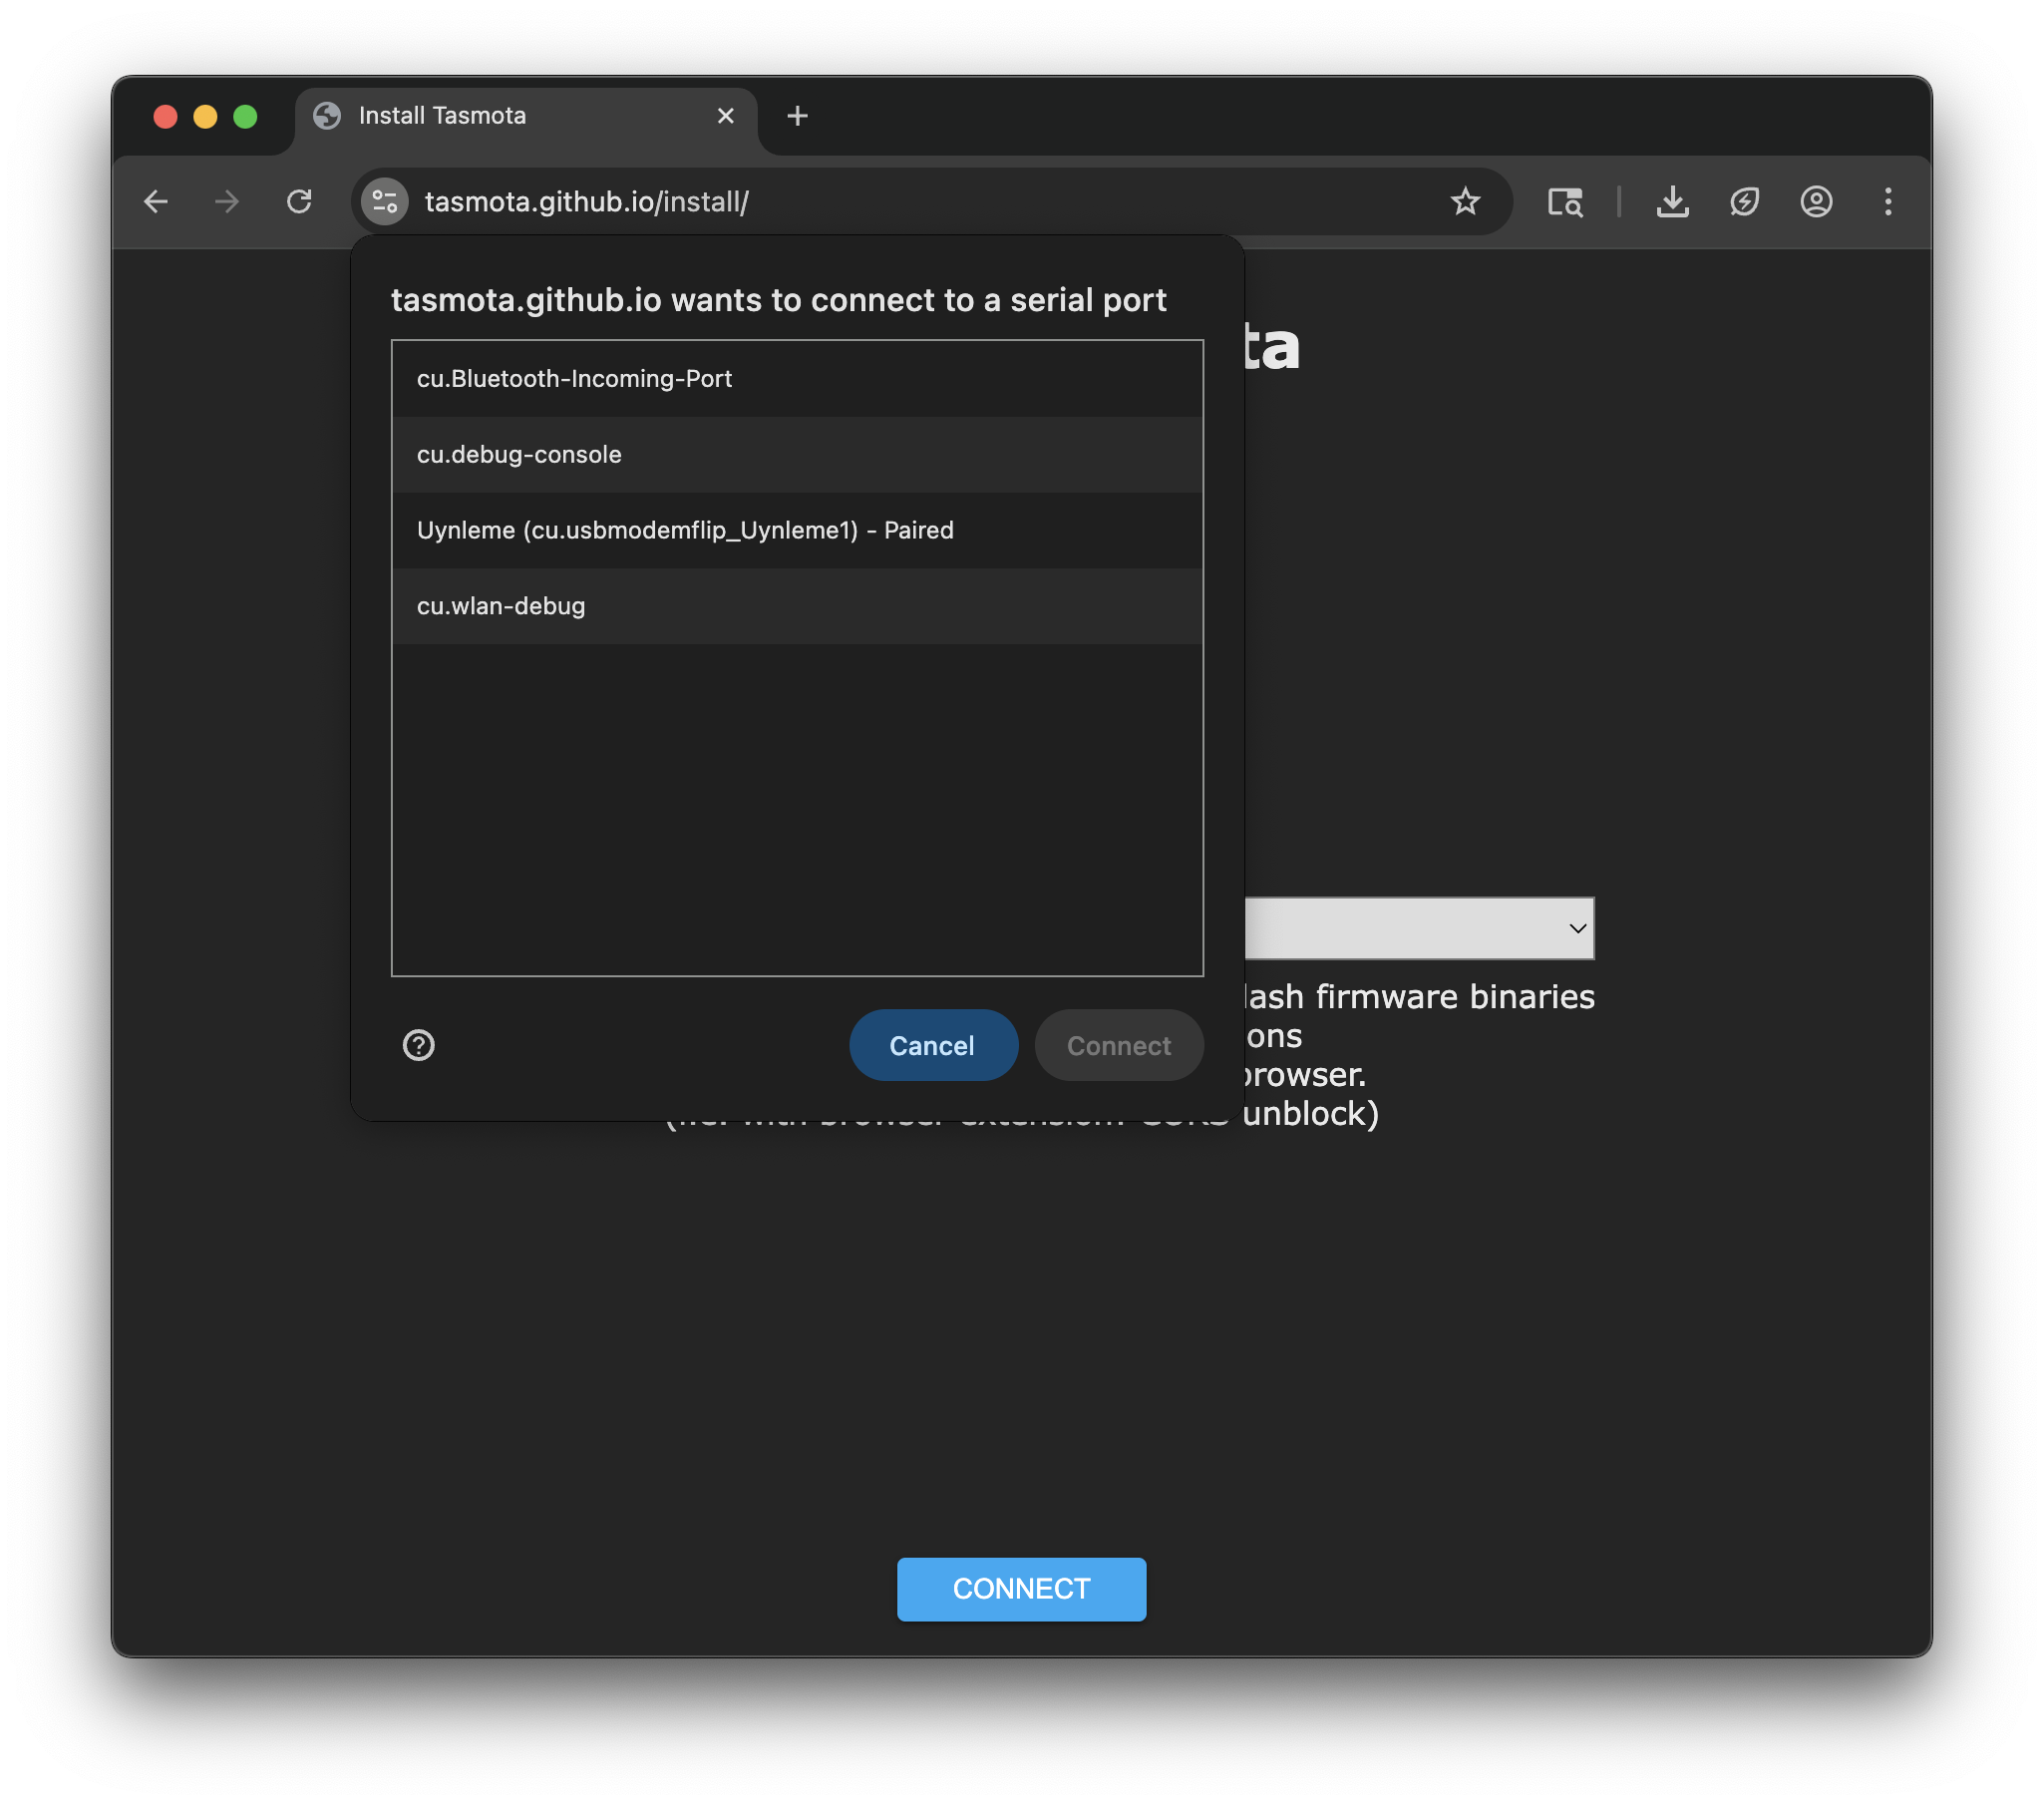
Now comes the fun part: flashing. Head to Tasmota’s web installer.
- Click Connect
- Select the Flipper’s USB device
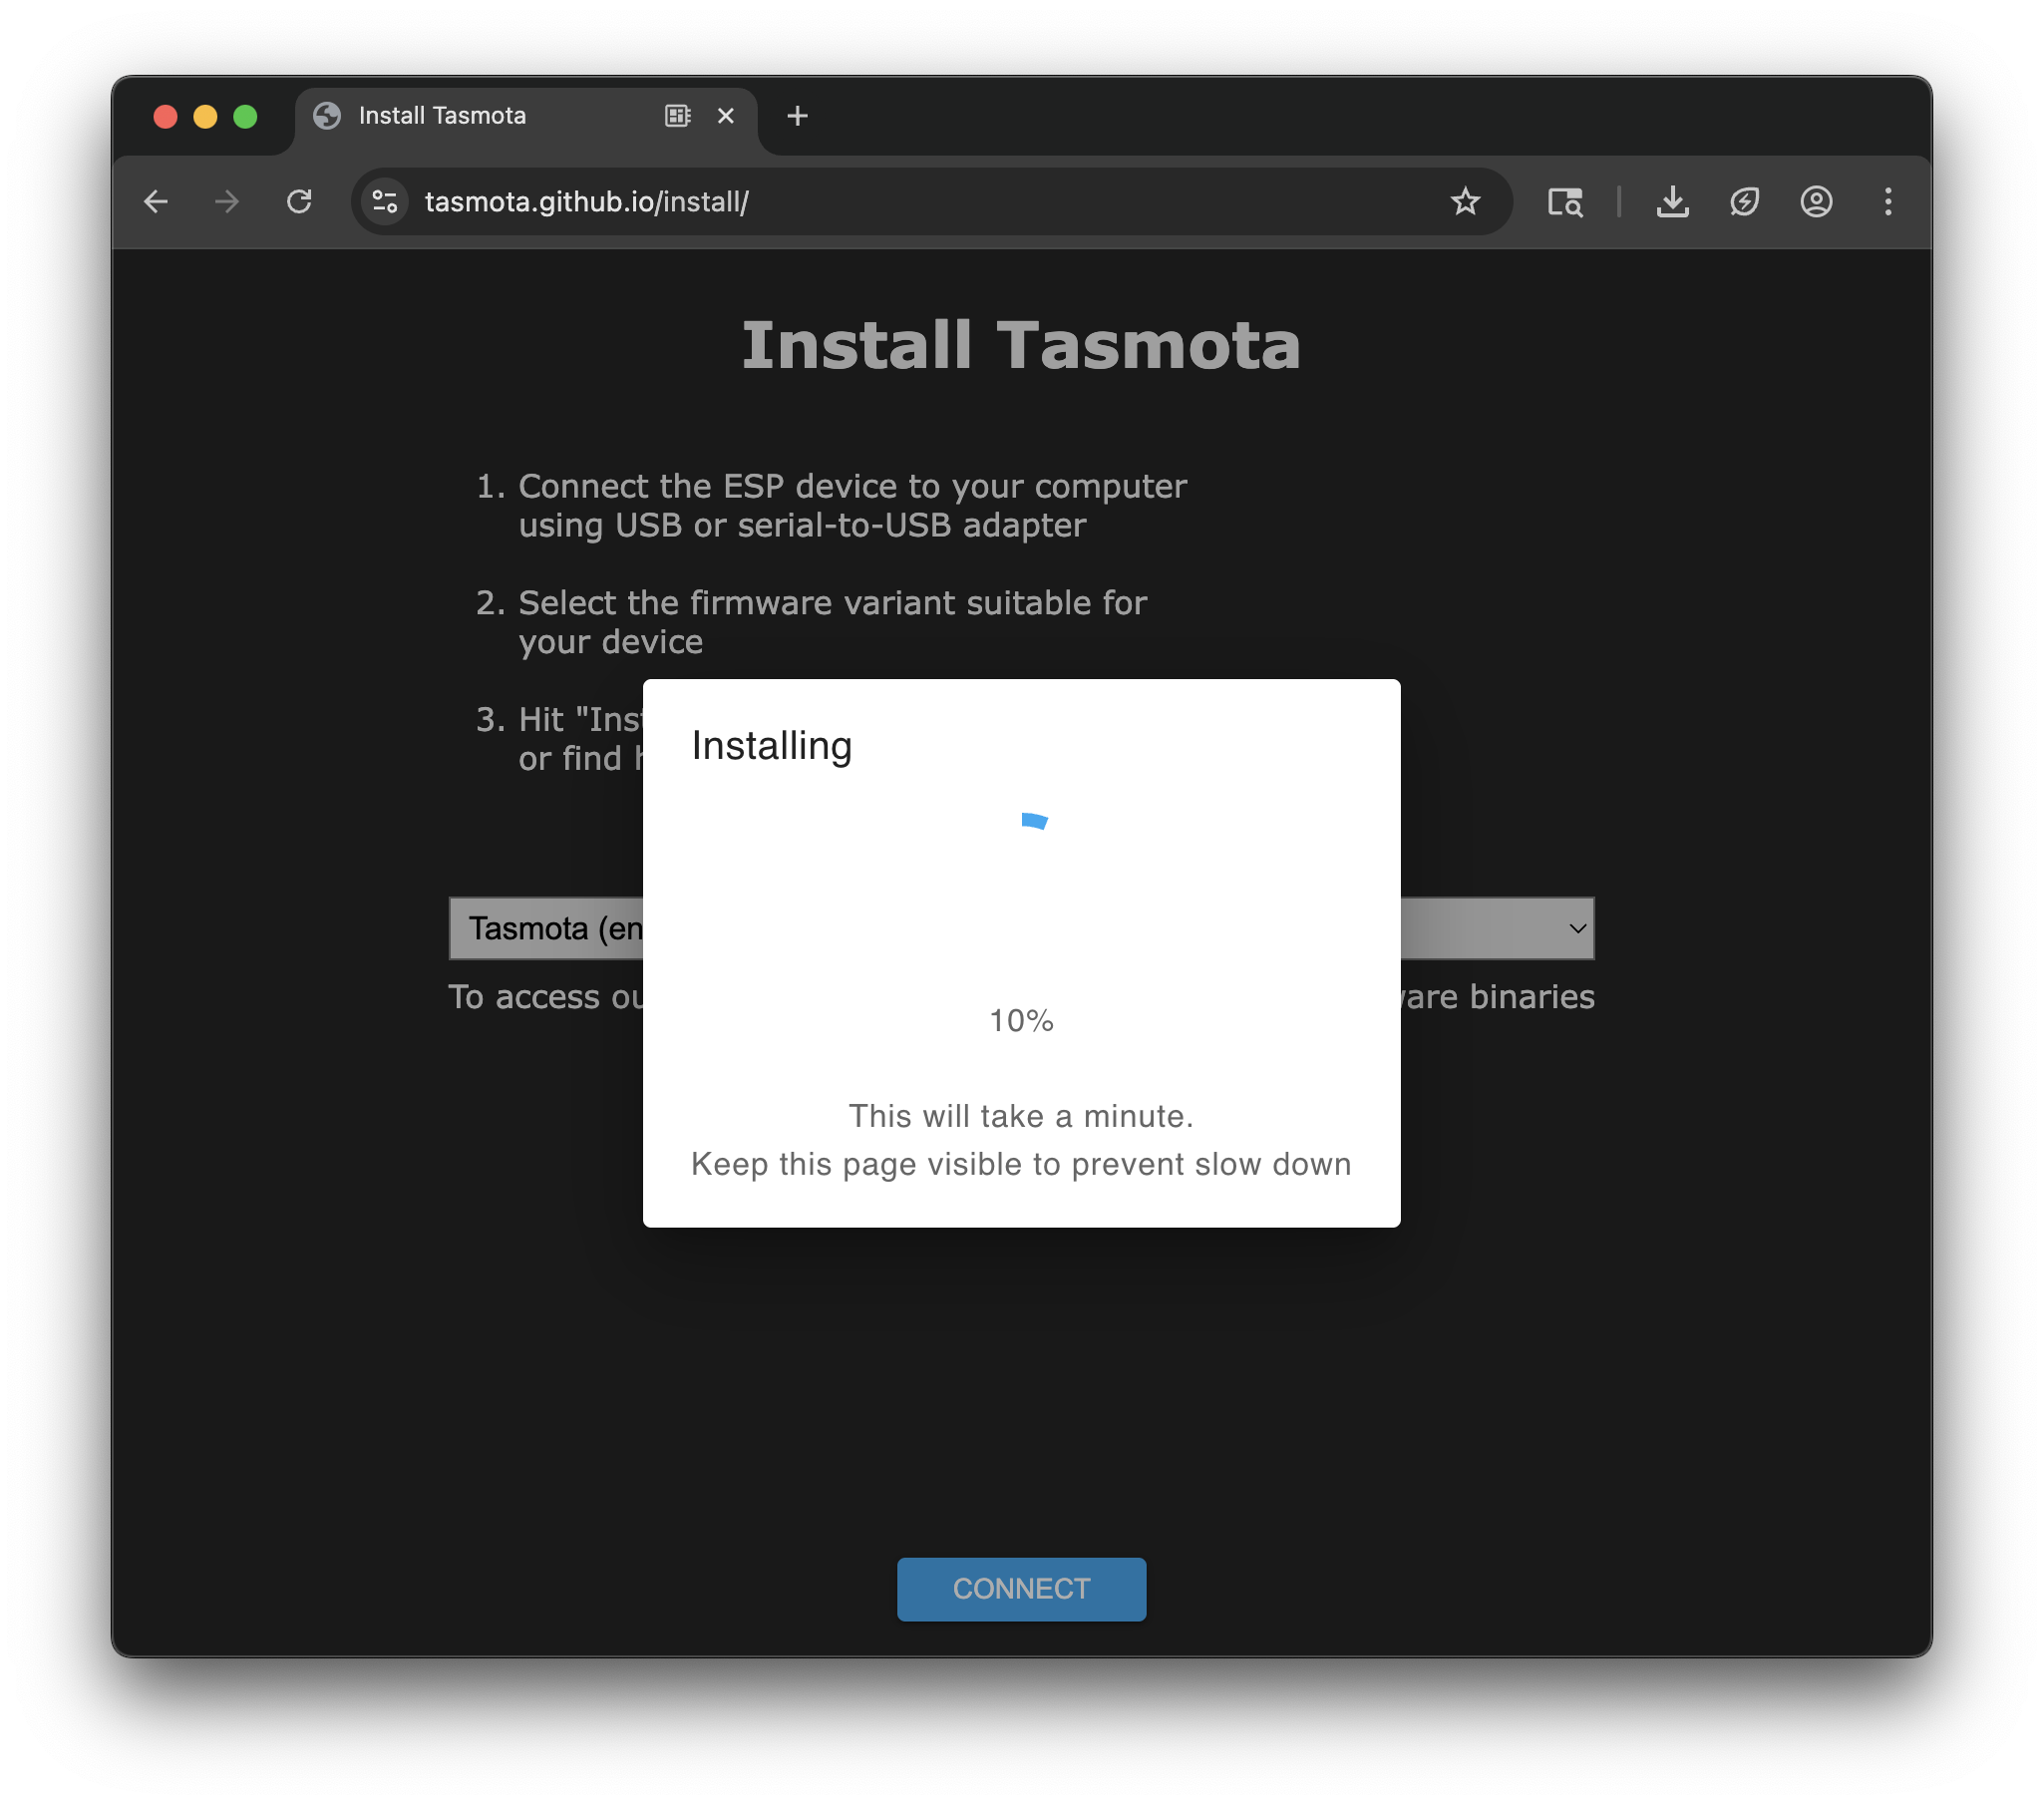
- Choose the Tasmota (English) build
- Wait while it flashes
Wrapping Up
And that’s it! The Sonoff S31 is now running Tasmota. You can connect to its Wi-Fi AP, configure it, and integrate directly into Home Assistant — all without relying on untrusted cloud services.
No USB dongle, no soldering, no nonsense. Just a Flipper Zero + Sonoff S31 + Tasmota = Local Smart Plug Freedom.
Enjoy your new offline-ready smart plugs!