Getting into your 40s comes with new hobbies. For some people it’s sourdough bread. For others, gardening. For me and my wife, it was birds.
It started with a window feeder she put up outside our kitchen. My initial reaction was pure skepticism: birds are going to get hurt on the glass, it’ll be a mess, the neighbors will complain. Then a few House Finches showed up. Then more. Then a Cardinal appeared, mid-molt, looking a little rough, so we named him Carequinha (Brazilian Portuguese for “little baldy”). Then a Tufted Titmouse landed, and I was done for. I love Titmice. Something about their little crests and complete lack of fear.
All of a sudden we were hooked. And yes, the project is named after them: Titmouse + Raspberry Pi = TitPi.
We eventually bought a [Birdfy] (https://www.birdfy.com): a smart feeder with a built-in camera. It’s a nice piece of hardware. But if you want bird species detection, you need to pay a subscription. And the app is a pain: slow, hard to navigate, downloads take ages. Sound familiar?
So I decided to build something better.
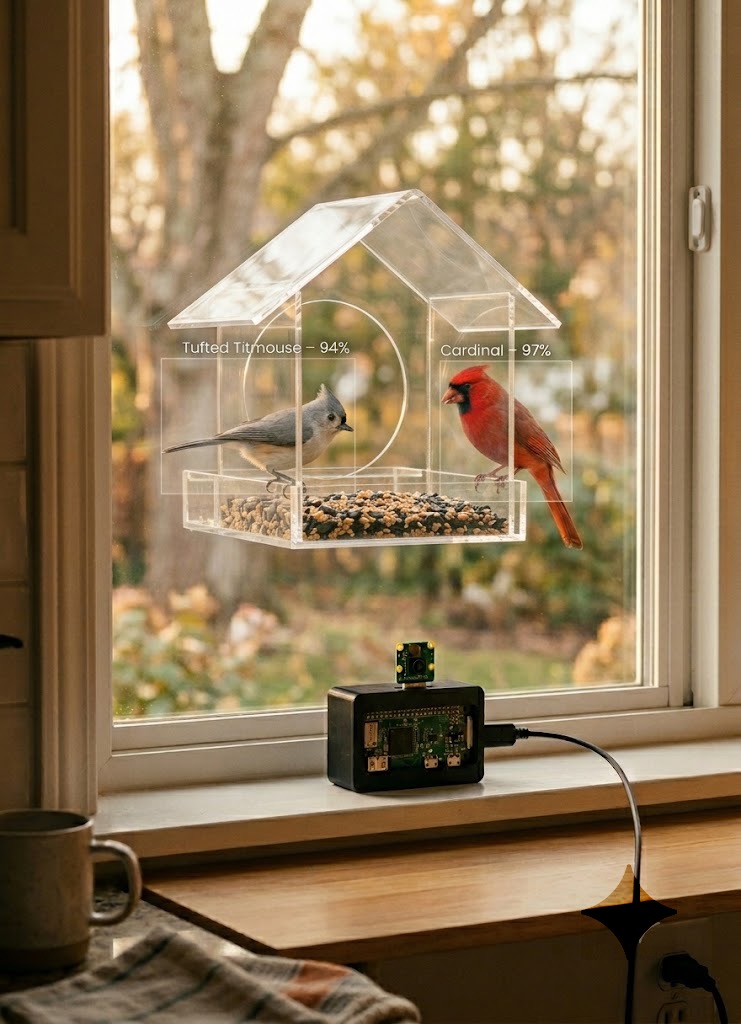
Introducing: TitPi. A Raspberry Pi Zero 2W with a Sony IMX500 AI Camera that watches the feeder 24/7, runs object detection directly on the sensor chip, identifies every visitor by species using a local TFLite model (with a GPT-4o-mini fallback for the tricky ones), and serves a live dashboard with stats, charts, and a 365-day activity heatmap.
Zero cloud fees. Zero subscriptions. And yes, it knows what a Titmouse looks like.
Repository: github.com/renanfernandes/titpi
Table of Contents
- Hardware
- Why the IMX500 Changes Everything
- Architecture Overview
- Spike-Based Detection
- Species Identification: Two-Stage Pipeline
- The Dashboard
- Bird of the Day
- Alerts and Notifications
- Tradeoffs and What’s Next
Hardware
| Component | Model | Approx. Cost |
|---|---|---|
| Board | Raspberry Pi Zero 2W | ~$15 |
| Camera | Sony IMX500 AI Camera | ~$70 |
| MicroSD | 32 GB+ | ~$8 |
| Case | 3D printed (files on GitHub) | ~$2 in filament |
| Total | ~$95 |
The expensive part is the IMX500. But it’s the whole point. Without it, you’re just running inference on the Pi’s CPU, which is slow, hot, and power-hungry on a Zero. The IMX500 runs the neural network directly on the sensor. The Pi barely wakes up until something interesting happens.
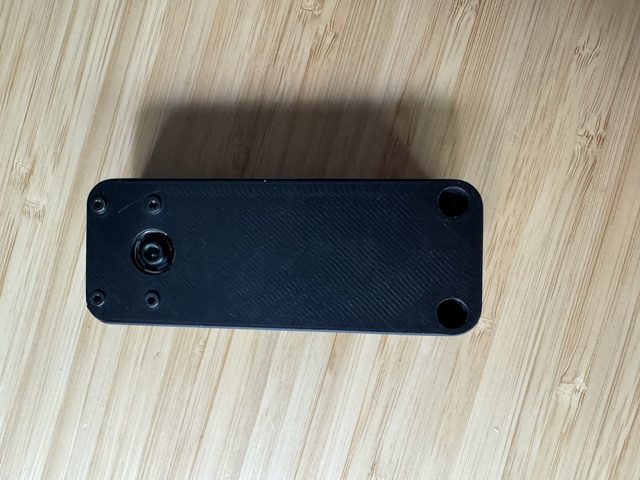
The case is a design by Hanz — Raspberry Pi Zero Case + Camera V3/V2 for Tripod on MakerWorld. It’s ultra-compact, has a built-in tripod mount (handy for angling precisely at the feeder), and the GPIO area can be easily cut open if you need access to the pins. The STL files are included in the repo.
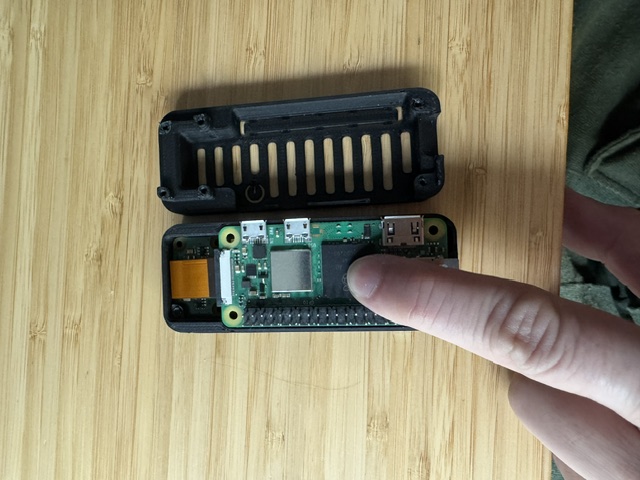
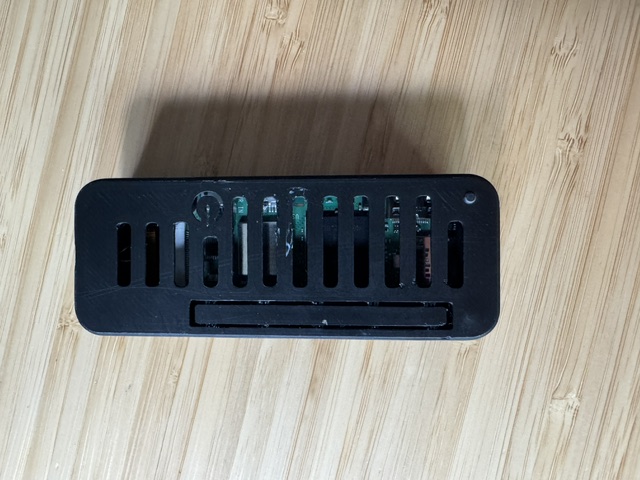
Assembly
The assembly was pretty simple. The Pi Zero 2W and the IMX500 camera fit perfectly into the 3D printed case. Here’s how the assembly looked step by step:
This is the full setup in practice: the feeder sits on the outside of the kitchen window, and the Pi + AI Camera sits on the inside, pointing through the glass at it.
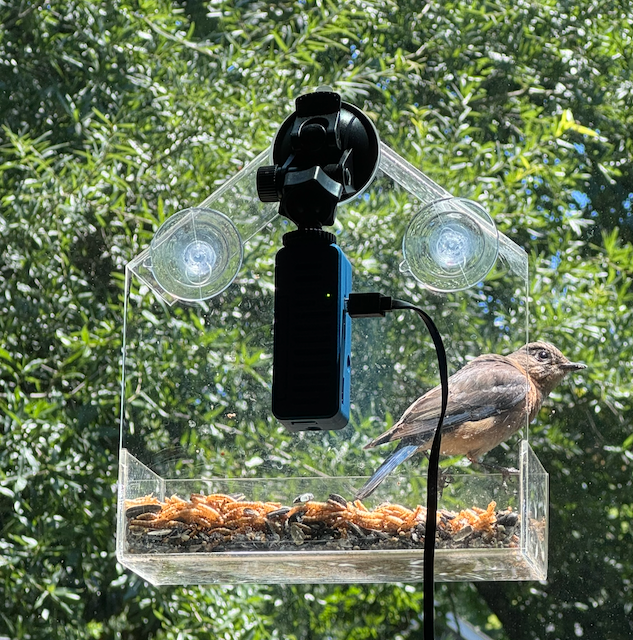
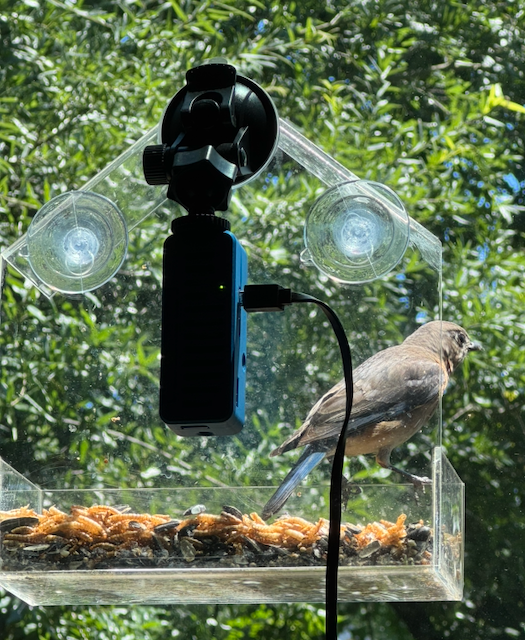
Not the most glamorous installation, but it works perfectly. The glass doesn’t meaningfully affect image quality at this range, and keeping the electronics inside means no weather exposure and a direct power cable to an outlet.
Why the IMX500 (or AI Camera) Changes Everything
Most DIY camera setups work like this: camera captures frames → CPU runs inference → CPU decides what to do. On a Pi Zero 2W, that pipeline is sluggish. You’re looking at maybe 2-3 FPS for a lightweight model, high idle CPU usage, and a lot of heat for a device sitting outside without a fan.
The Sony IMX500 flips this model. It has a dedicated AI accelerator built directly into the image sensor. The inference happens before the frame ever leaves the chip. By the time the Pi sees the metadata, the model has already run.
What the Pi receives from the IMX500 is not pixels, it’s structured output: bounding boxes, class IDs, and confidence scores. The Pi is essentially getting a processed report: “there’s a bird at these coordinates, 78% confidence.” This runs at ~10 FPS with near-zero CPU load on the Pi.
For a feeder camera that needs to run 24/7 on minimal power, this is exactly what you want.
Architecture Overview
IMX500 sensor  →  on-chip SSD MobileNet v2  →  detection metadata
                                                        │
                                                   watcher.py
                                              (spike detection + capture)
                                                        │
                                                   bird_id.py
                                          (local TFLite → GPT-4o-mini)
                                                        │
                                                   database.py
                                                   (SQLite)
                                                        │
                                    ┌───────────────────┼───────────────────┐
                               notifier.py         web.py            compute_botd.py
                             (email alerts)      (dashboard)        (Bird of the Day)
Four Python files do the real work. The rest is configuration, templates, and systemd.
Spike-Based Detection
The naive approach: “trigger whenever a bird detection score exceeds a threshold” — sounds simple but fails quickly in practice. Lighting changes throughout the day shift the baseline confidence for everything. A low-flying cloud passes, the scene darkens, scores drop. The sun comes out, scores spike. You’d get false positives at dawn and miss real visitors at noon.
There’s another wrinkle: the camera is mounted very close to the feeder. A House Finch filling the frame from 6 inches away looks nothing like the training data. The COCO model only knows “bird” as a category anyway, and has confidently reported elephants, geese, and bears at my feeder. Yep. a bear. At a window feeder. In the city. The spike-based approach helps here too: we’re not trusting what the model thinks it sees, just using the score as a signal that something changed. The species identification happens separately, on a proper close-up photo.
TitPi uses an adaptive baseline instead. Over a rolling window of 60 frames, it tracks the median detection score for whatever the model is seeing at idle. A real event is not just a high score. It’s a score that spikes above the current baseline by a configurable margin. Two consecutive spike frames are required before anything triggers.
baseline (60-frame rolling median): 0.42
spike_threshold: 0.20
trigger score: 0.42 + 0.20 = 0.62
If the model scores 0.65 on two back-to-back frames, it’s probably a real bird. If it scores 0.63 once after a lighting shift, the baseline catches up and ignores it.
This turned out to be one of the most important parts of the whole system. Without it, you’d be drowning in false positives.
Species Identification: Two-Stage Pipeline
Knowing “there’s a bird” is step one. Knowing which bird is the fun part.
Stage 1 — Local TFLite classifier (fast, no network)
TitPi uses Google’s AIY Birds V1 MobileNet model, which classifies ~964 species from a 224×224 crop. It runs locally on the Pi in about 300ms. If it returns a result with ≥30% confidence, we’re done.
Stage 2 — GPT-4o-mini fallback (accurate, network required)
If the local model is uncertain — backlit shot, unusual angle, juvenile plumage — the best photo from the visit gets sent to GPT-4o-mini via the GitHub Models API. It returns a JSON object with common name, scientific name, category, and confidence.
To avoid hammering the API (and your rate limits), there’s a 30-second minimum interval enforced between GPT calls across all concurrent detections.
False positive cleanup
If neither the local model nor GPT can identify anything in the photo, the detection is discarded entirely: photos and video deleted. This keeps the database clean without manual curation.
The Dashboard
web.py is a small Flask app serving a single-page dashboard. Everything is loaded via /api/* endpoints — no server-side rendering.
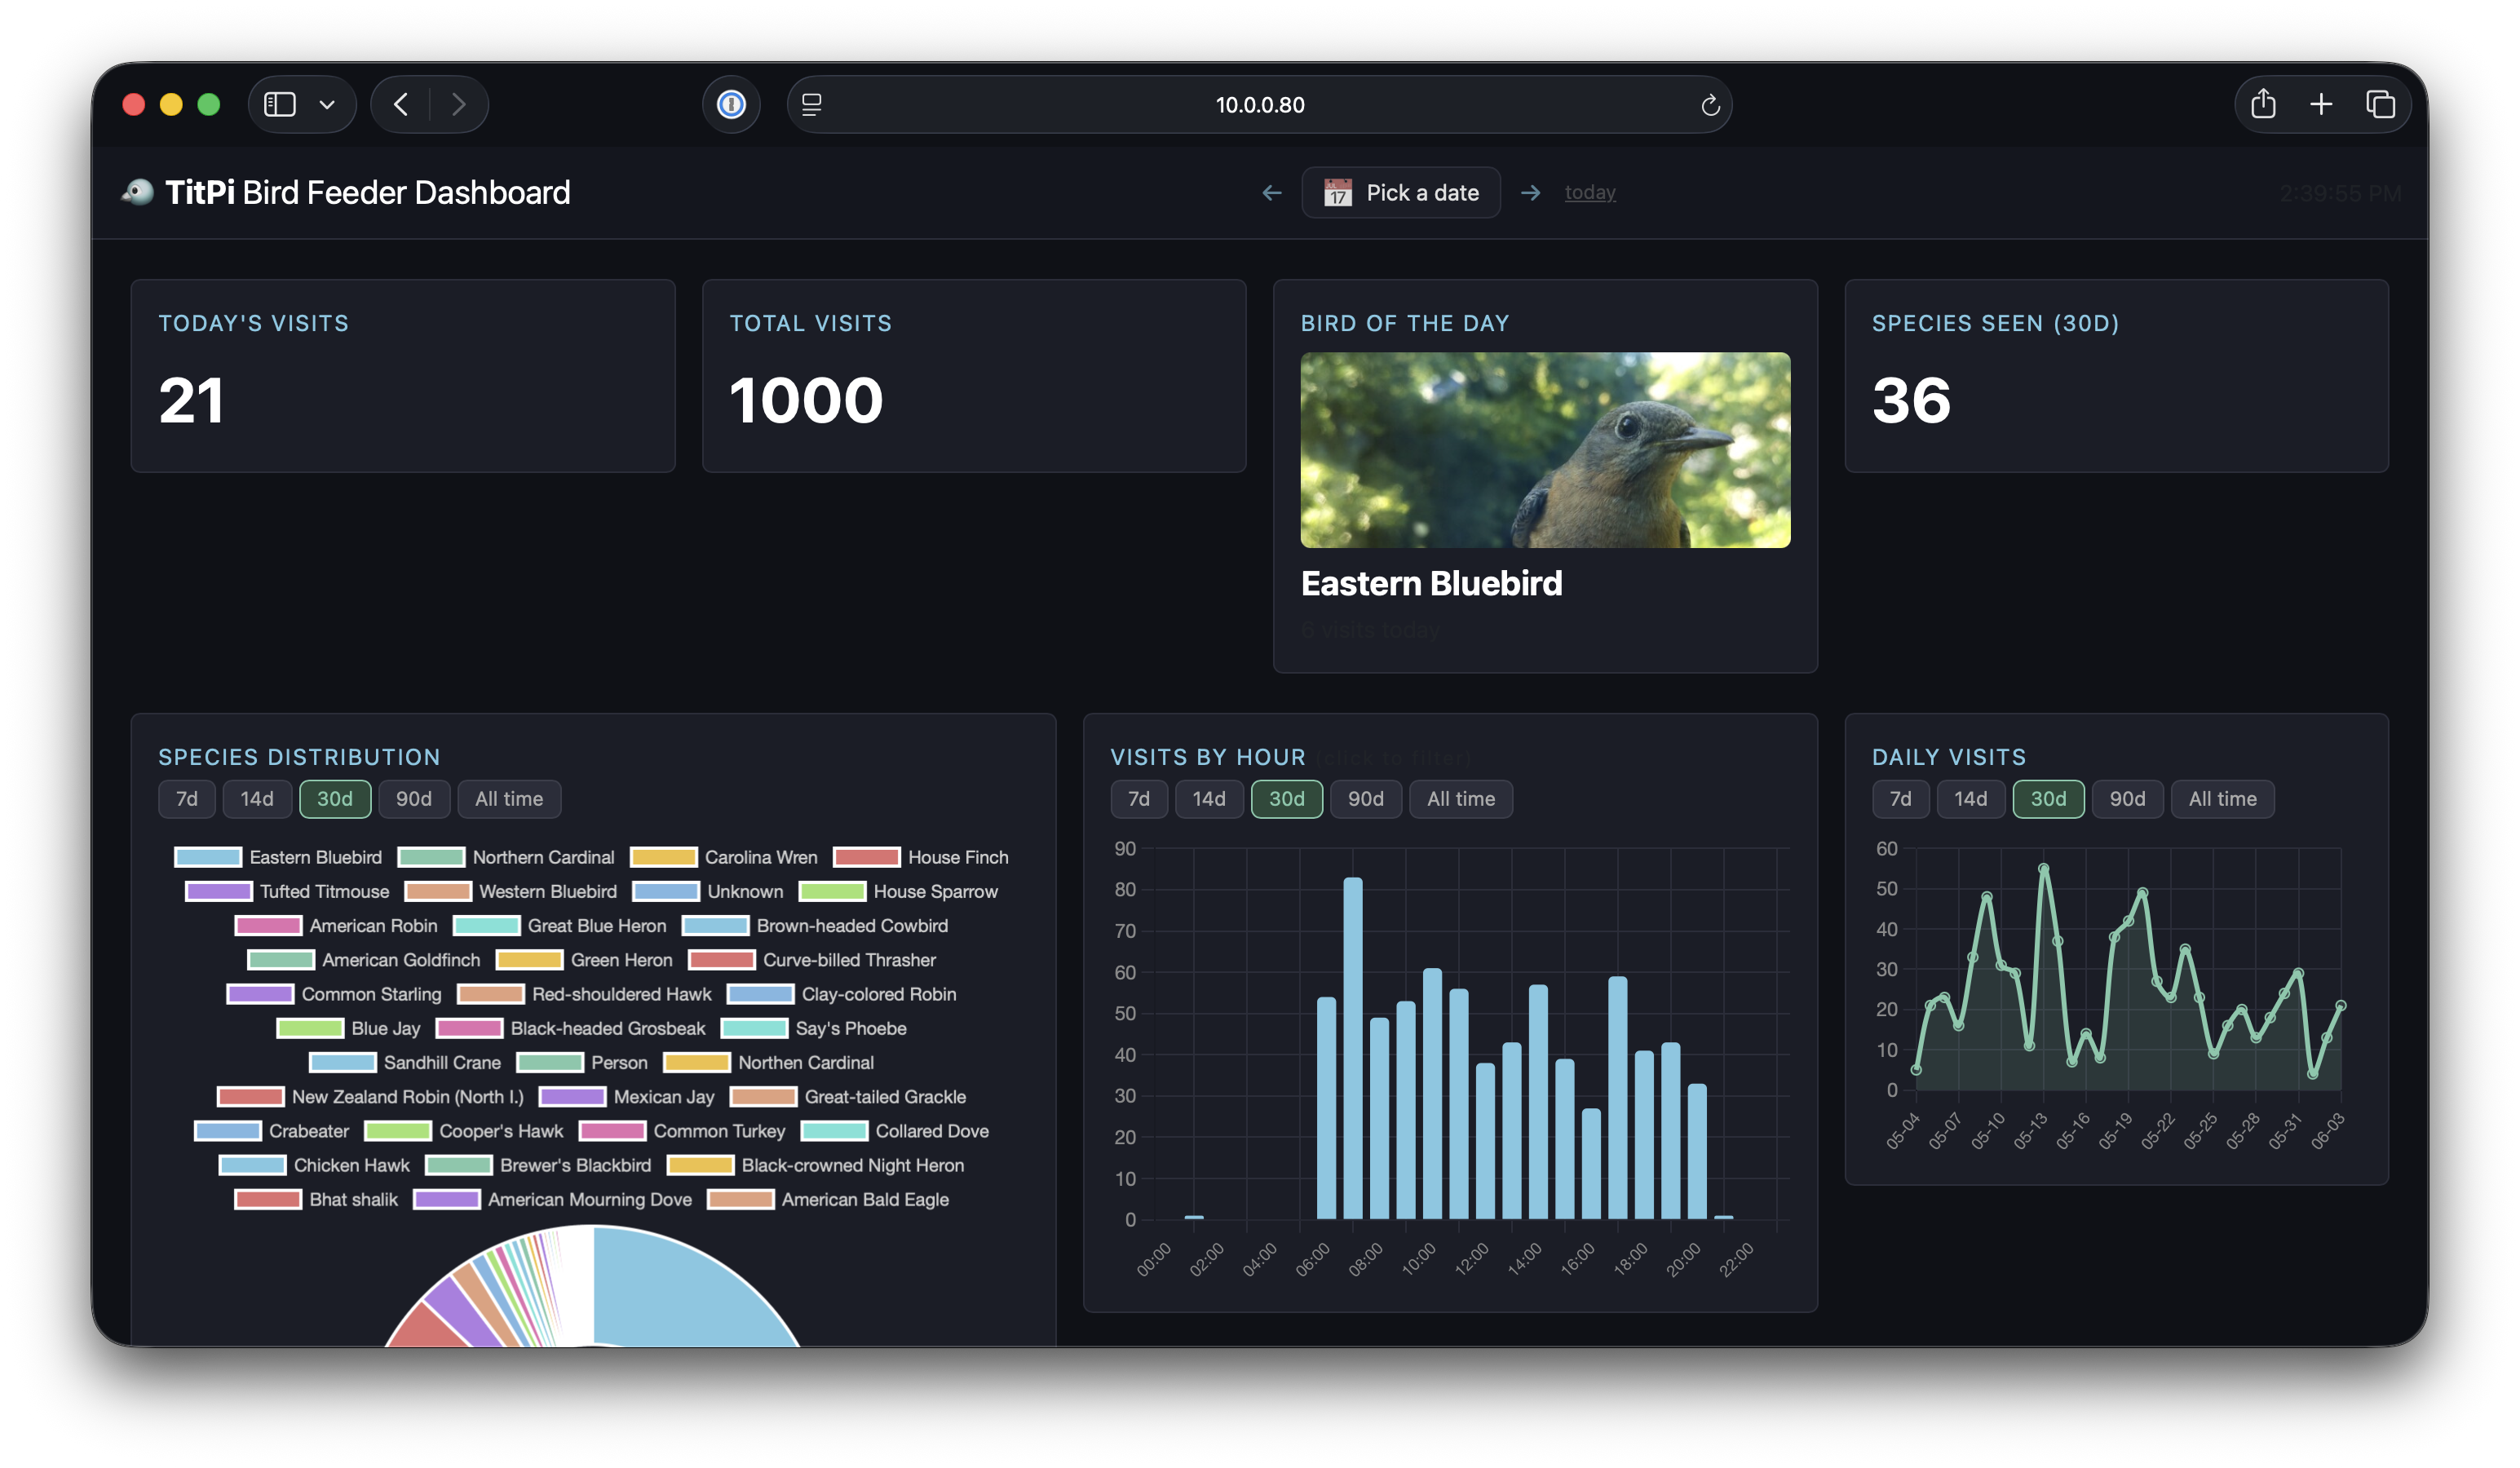
At the top you get the quick stats: visits today, total visits, how many species were seen in the last 30 days, and the Bird of the Day with a photo you can click to see full size.
Today’s bird is a Bluebird — and there’s a fun story behind that: a Bluebird couple just had three chicks, and they’ve been bringing them to the feeder every single day. Watching the parents teach the juveniles to eat is something else.
Below that: a species doughnut chart (click any slice to filter the detection feed), an hourly bar chart showing when the feeder is busiest, and a daily activity chart. That last one has a very predictable spike pattern — it correlates almost perfectly with when I put fresh seeds in (What a surprise).
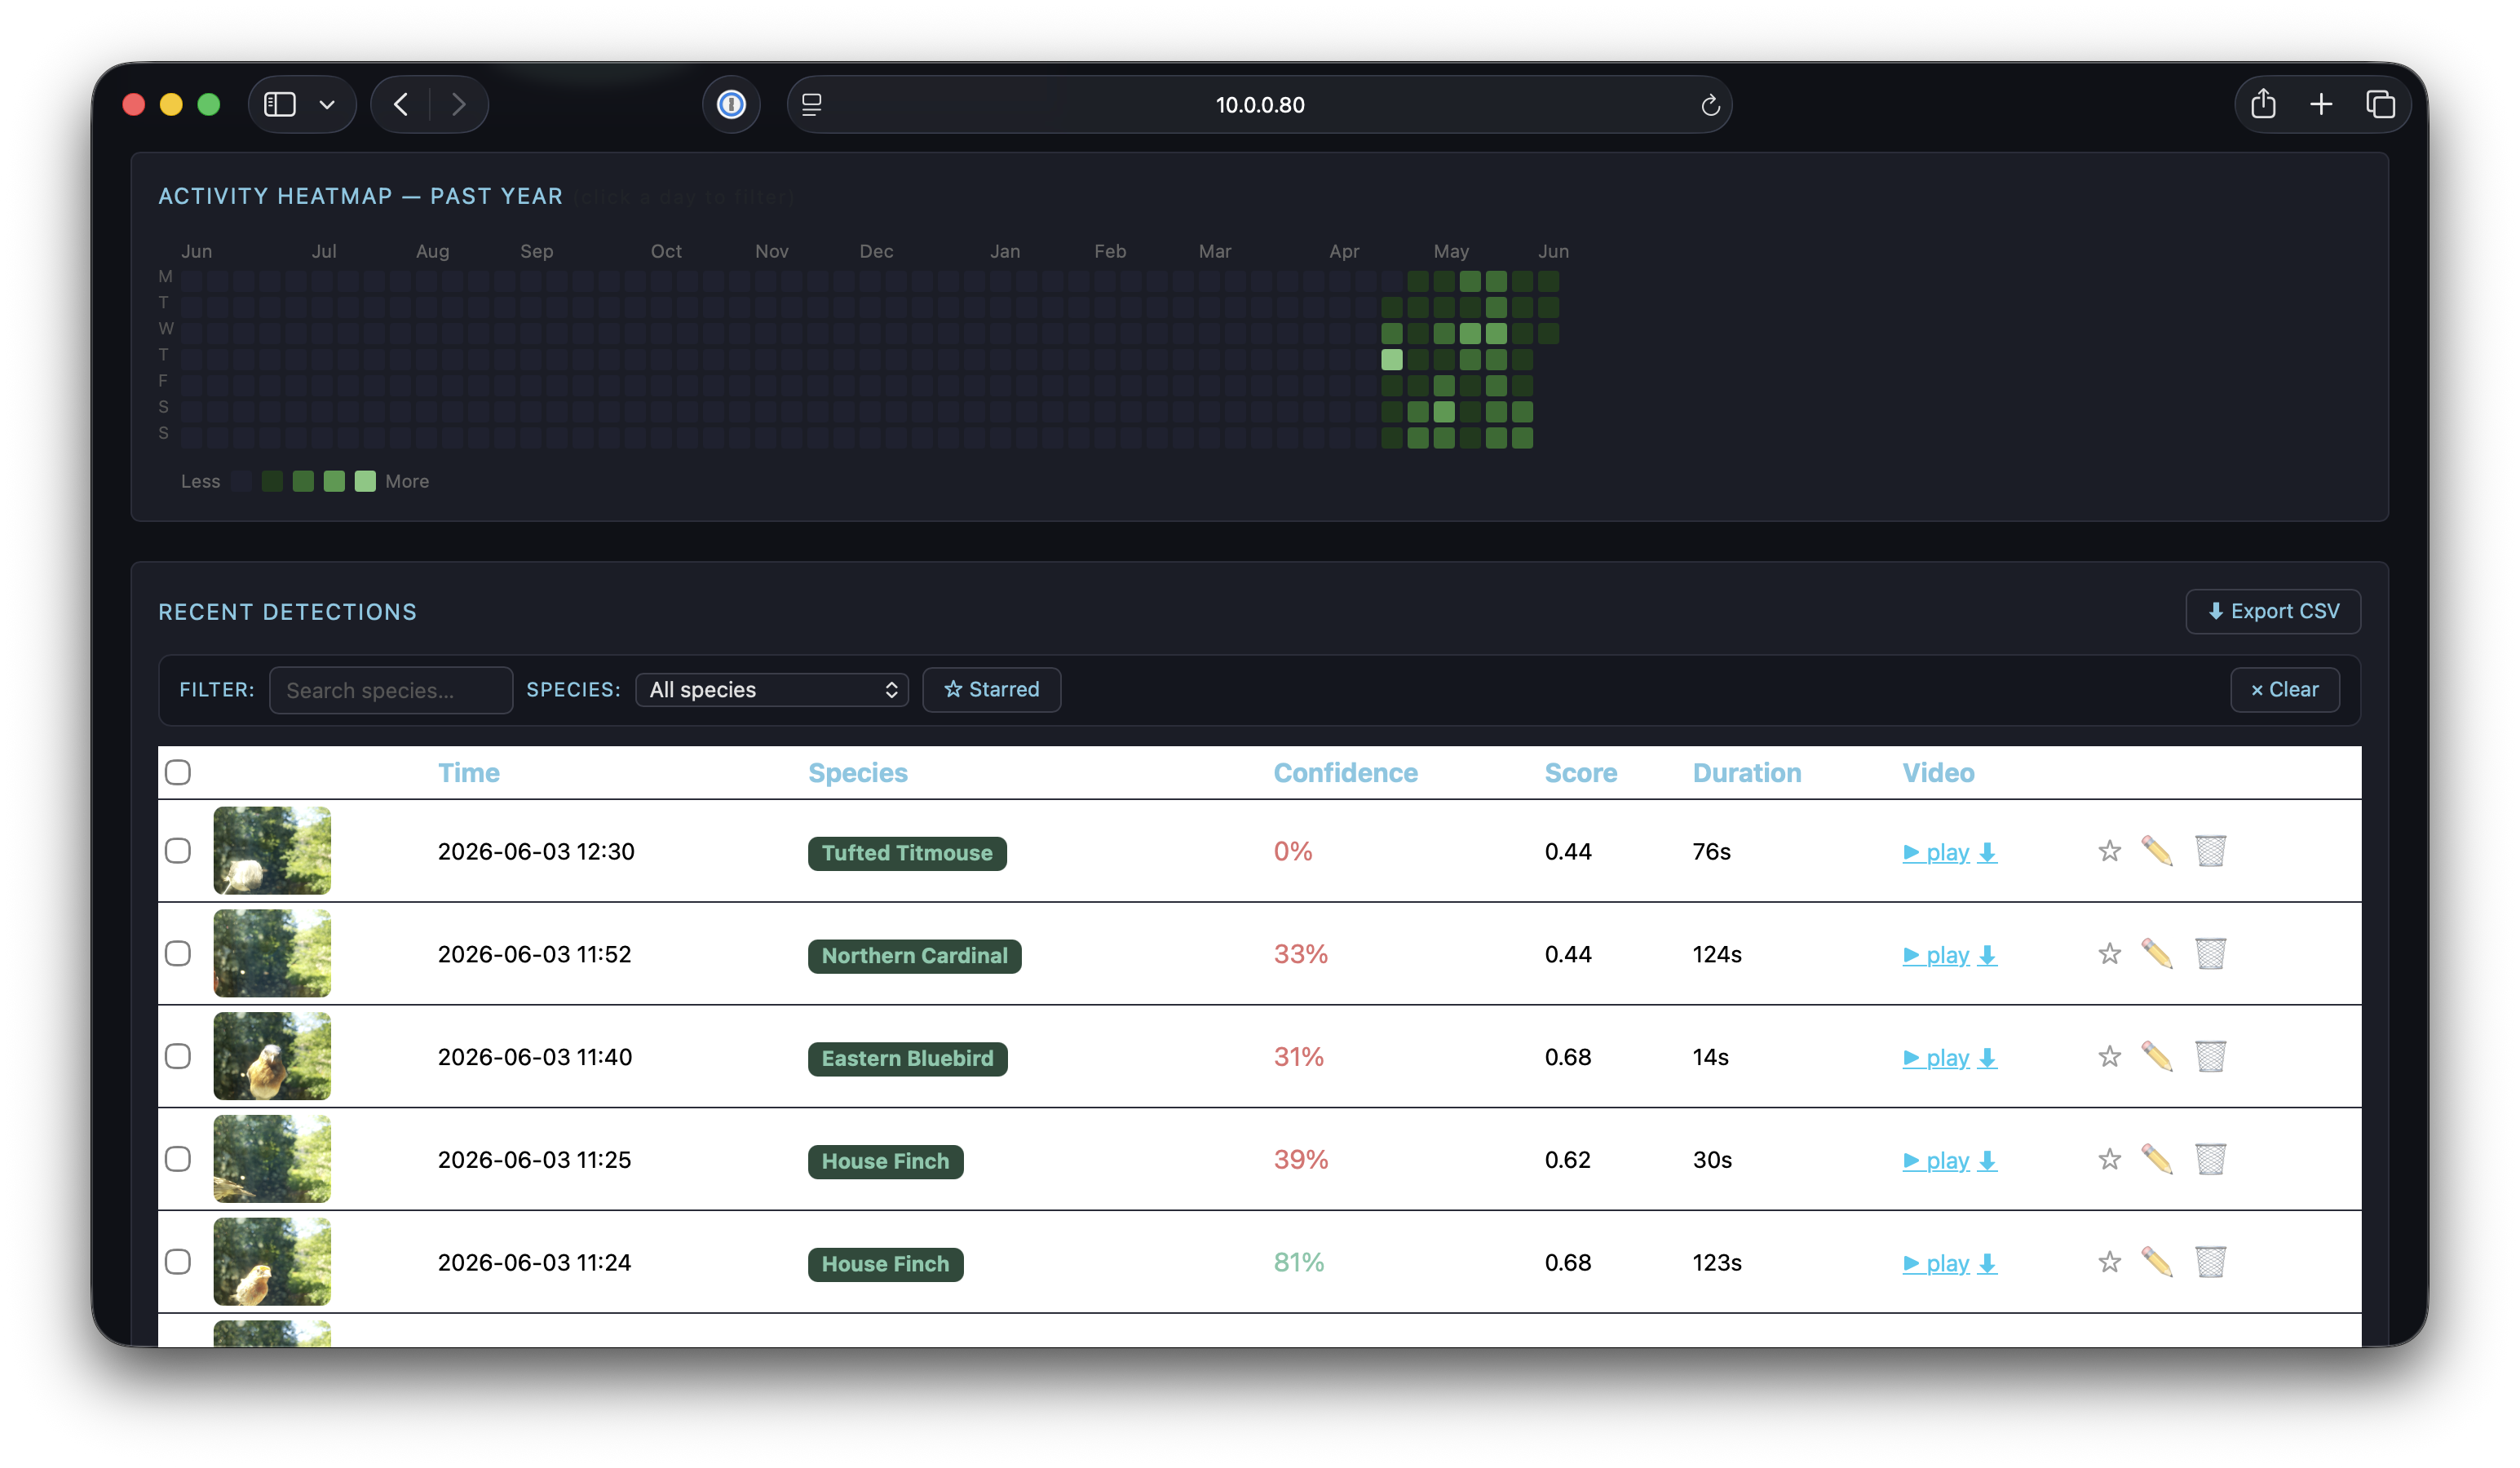
Scroll down and you get the GitHub-style heatmap and the full detections table. Each row shows the species, confidence score, and thumbnail. You can click the photo to open the full image — and there’s a video clip attached to each detection too. Some of them are genuinely entertaining.
One of the Titmice figured out there were peanuts in the mix, grabbed one, flew off to a nearby branch, and spent two minutes cracking it open. The camera caught the whole thing.
If the model mislabels something (it happens), you can correct it inline directly from the table.
What’s in the dashboard:
- Today’s count and total detections at a glance
- Species doughnut chart — click a slice to filter the feed by that species
- Hourly bar chart — when is your feeder busiest?
- 365-day activity heatmap — the GitHub contribution graph, but for birds
- Photo lightbox — click any detection to see the full image
- Bulk management — multi-select detections to edit species or delete
The heatmap is my favorite feature. After a few months you start to see patterns: which weeks had the most activity, seasonal arrivals, the quiet stretch in late summer.
Bird of the Day
Every evening at 7 PM, a one-shot systemd service runs compute_botd.py. It picks the best bird of the day using a very simple scoring system:
- First-ever sighting wins — a species never seen before in the database always beats a returning visitor, regardless of visit count.
- If no new species, the most-visited species wins.
- Starred detections add bonus points — marking a photo as starred signals quality, so each star adds +3 to that species’ score.
The winning photo gets copied to detections/bird_of_the_day/ and shown prominently on the dashboard.
Alerts and Notifications
On each confirmed detection, notifier.py sends an HTML email with:
- Inline photo of the visitor
- Species name, scientific name, and confidence
- Whether the ID came from the local model or GPT
- Link to the dashboard (or attached video, configurable)
Here’s what an alert looks like in practice:
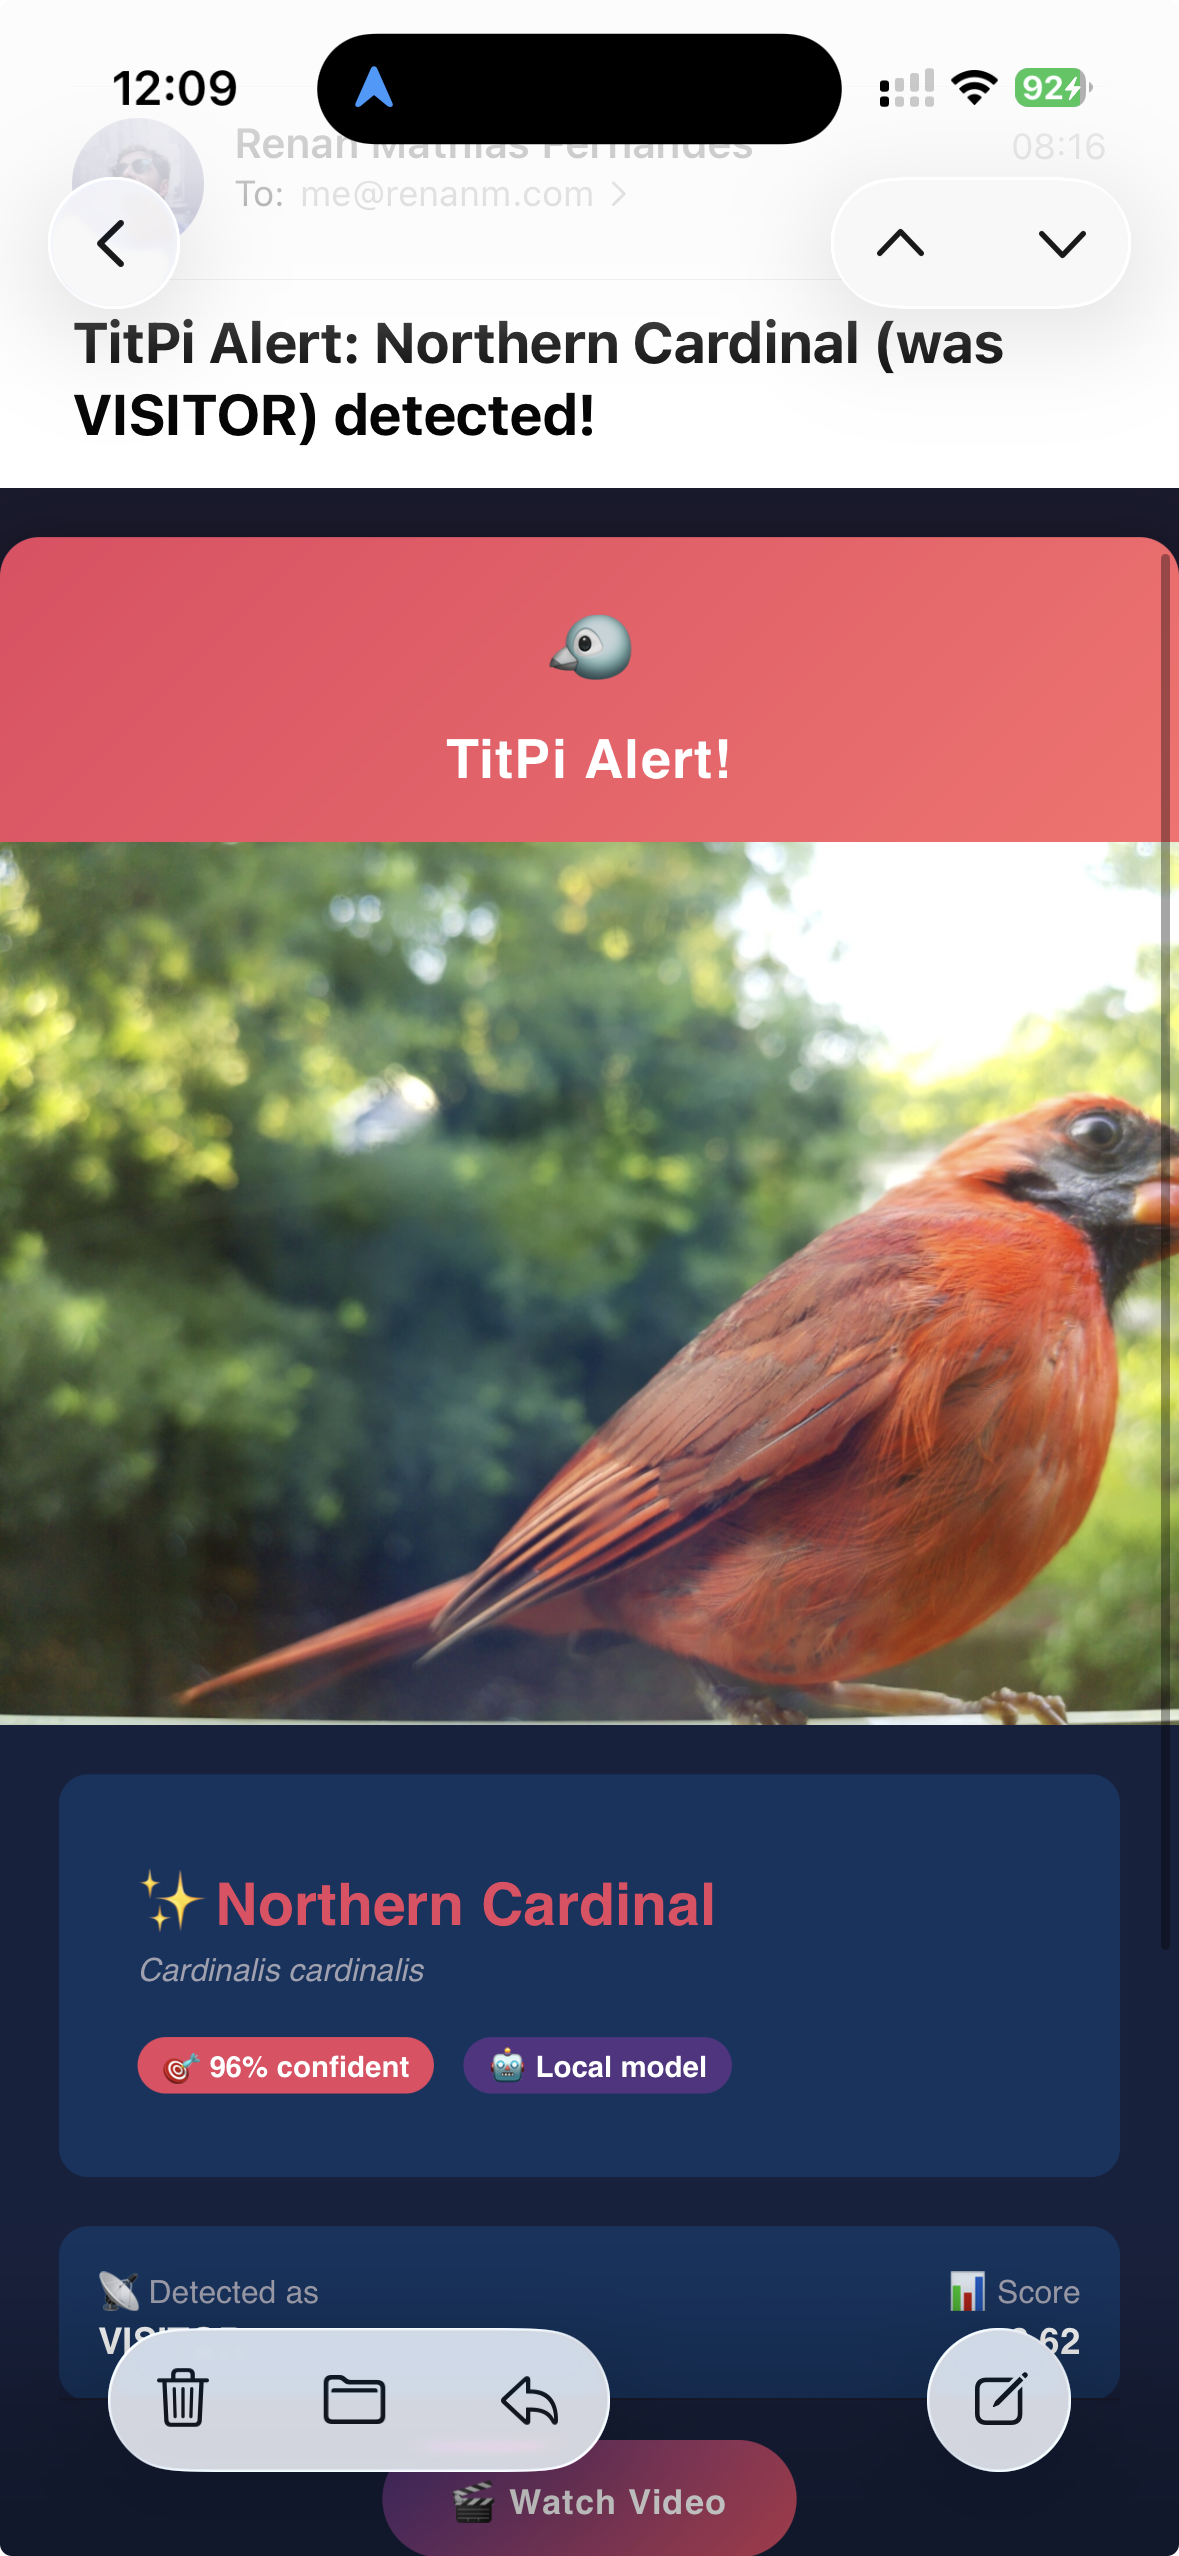
The email template uses a simple custom renderer — just {{ variable }} substitution and {% if %} conditionals, no Jinja2 dependency needed on the Pi.
Tradeoffs and What’s Next
This is a v1. It works well enough that I’ve been running it daily for months, but there are real limitations:
- IMX500 is the only supported AI camera path — Camera Module 3 or any Camera honestly works via a motion-detection fallback, but it’s much less accurate
- GPT-4o-mini costs money — small amounts, but it’s the only part with an ongoing cost. A better local model would eliminate this entirely
- No retention policy — detections accumulate. On a 32 GB card this isn’t an issue for a while, but something to watch
- Single node — no off-device backup yet
Things I want to add:
- Push notifications (ntfy / Pushover) as an alternative to email
- Home Assistant integration — show the last visitor on a dashboard card
- Better local model — the AIY Birds V1 is from 2019. Newer models would improve accuracy significantly
- Retention/cleanup policy for old detections
If you build one, I’d love to hear what shows up at your feeder. Open an issue or drop a comment below.
There’s something quietly satisfying about a $95 computer sitting outside, watching for birds, doing real AI inference at the edge, and knowing every visitor by name. No subscription, no cloud, no data going anywhere you didn’t choose.
Build your own: github.com/renanfernandes/titpi
Bonus: A Real TitPi Capture
And finally proof it works! This Tufted Titmouse was caught by TitPi itself this week. No staging, no stock photo. Just our model showing up, grabbing a seed and chilling out!
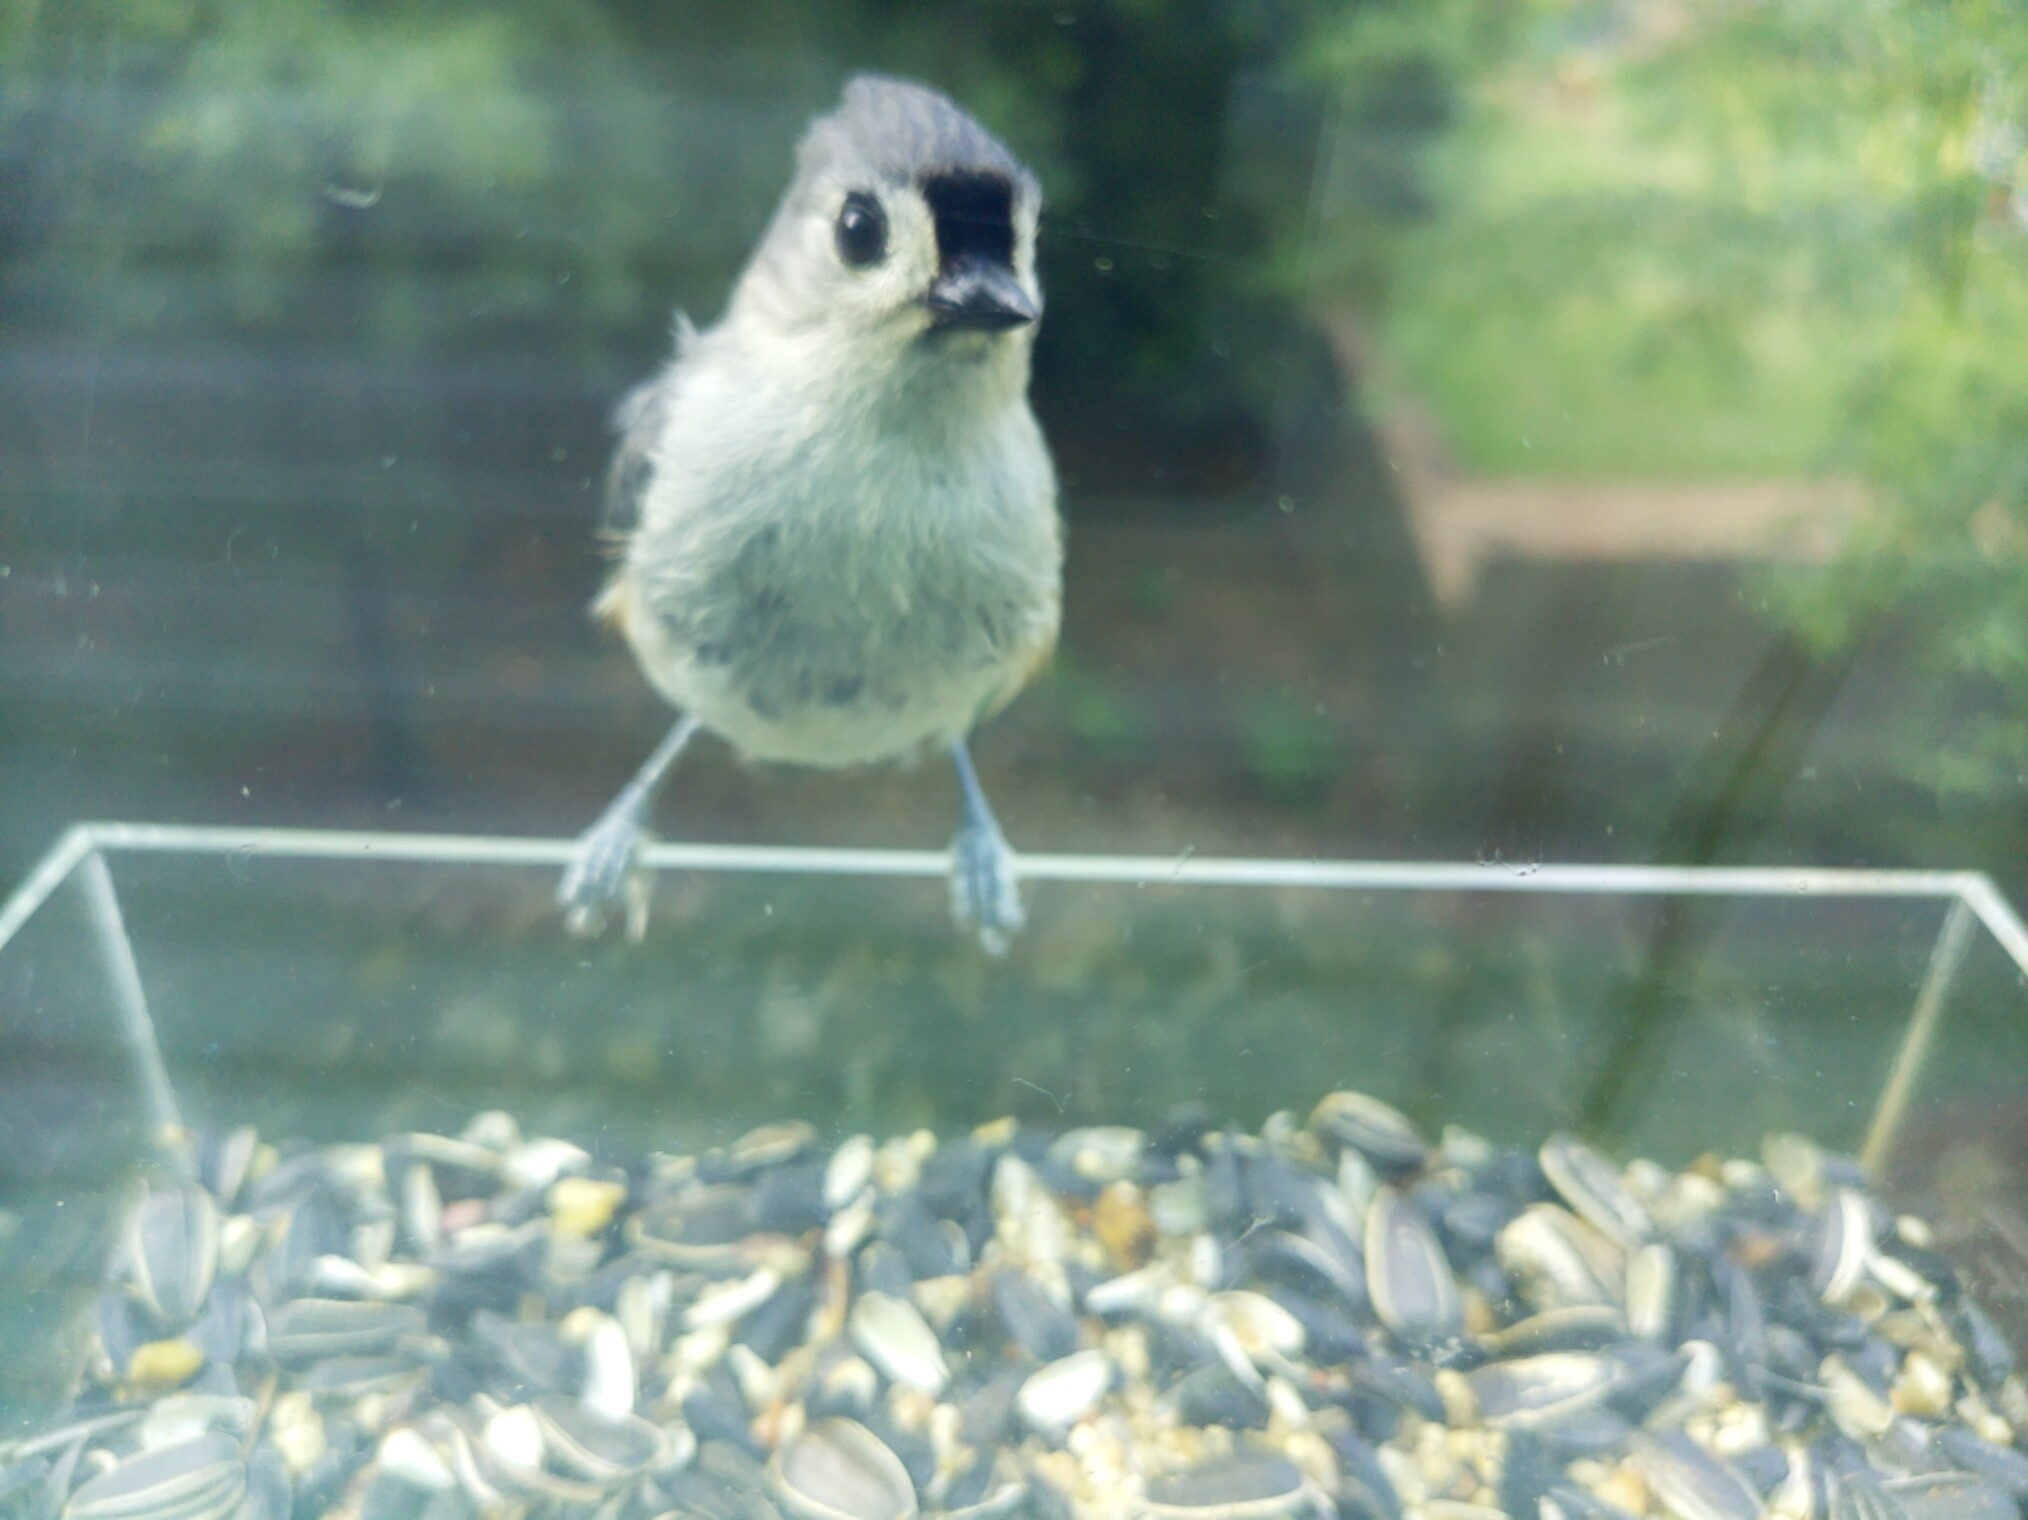
The namesake, in the flesh. This is exactly why I built this thing.